Server Installation
This documentation will guide you on how to run the Cloud Office Print Server on the following platforms
- Linux (7 and higher)
- Windows (2012 and higher)
- Docker
- Oracle Cloud
Hardware requirements
Following table gives an overview of the minimum requirements to run the Cloud Office Print Server:
| Type | Standard | High-Memory |
|---|---|---|
| CPU | 2 cores | 4 cores |
| RAM | 6 GB | 20 GB |
| Hard Disk | 2 GB | 2 GB |
We recommend a CPU with at least 2 cores. For memory, Cloud Office Print initially consumes about 1 GB RAM, but depending on the prints it can go up to 4 GB for the standard Cloud Office Print version or 16 GB for the high memory Cloud Office Print version. In case you have larger documents, we recommend downloading the high memory version. We recommend 2 GB of hard disk space: the executable and supporting files are about 1 GB and we might create some temporary files and a log and error file.
A question we often get is: does Cloud Office Print have to go on its own server or the application server?
You can choose. Having Cloud Office Print on the same server as the application is most performant and easiest as you don’t have network connections to other servers. If you install Cloud Office Print on its own server you can size and monitor that server better. The Cloud Office Print server doesn't need to be accessible from the outside (clients). So it’s whatever you are most comfortable with.
Installation on Linux
Download and Unzip File
Log in on cloudofficeprint.com and download the Linux version of Cloud Office Print.
Copy the zip you downloaded to the server where you want to run the Cloud Office Print Server.
Unzip the file in a directory of choice e.g. /opt/cop.
# create cop directory
mkdir /opt/cop

# unzip
unzip cop_linux_v21.1.1_hm.zip -d /opt/cop

# create symbolic link for latest directory (see further for more explanation)
ln -s /opt/cop/v21.1.1 /opt/cop/latest

# give permissions to executable
chmod 755 /opt/cop/latest/server/CloudOfficePrintLinux64
In order for Cloud Office Print to convert PDFs it relies on LibreOffice (6 or higher) and Java, so both of those should be available on the server. You will find step-by-step instructions on how to verify if the pre-requisites are met and how to install those below.
Install LibreOffice
Verify if LibreOffice is already installed on your system:
$ soffice --version
LibreOffice 7.0.6.2 0c292870b25a325b5ed35f6b45599d2ea4458e77

$ java -version
openjdk version "1.8.0_282"
OpenJDK Runtime Environment (build 1.8.0_282-b08)
OpenJDK 64-Bit Server VM (build 25.282-b08, mixed mode)
In case you need to install LibreOffice and Java you can follow the next steps.
# install supporting packages
yum install wget

# download LibreOffice for the PDF converter (or copy to the server)
# note that sometimes you have to retry in order for it to download
cd /tmp
wget https://download.documentfoundation.org/libreoffice/stable/7.0.6/rpm/x86_64/LibreOffice_7.0.6_Linux_x86-64_rpm.tar.gz

# make sure no old versions exist
yum remove openoffice* libreoffice*

# install LibreOffice
# extract tar
tar -xvf LibreOffice_7.0.6_Linux_x86-64_rpm.tar.gz

# install via yum
cd /tmp/LibreOffice_7.0.6.2_Linux_x86-64_rpm/RPMS/
yum -y localinstall *.rpm
# alternative to above you can do: rpm -ivh *.rpm

# optional: install some missing dependencies (depending your linux version this is not necessary)
# Note if the below fails; you can add the Oracle repo:
# cd /etc/yum.repos.d/
# wget http://yum.oracle.com/public-yum-ol7.repo
yum -y install cairo.x86_64
yum -y install cups.x86_64 --skip-broken
yum -y install mesa-libGL.x86_64

# optional: install Java dependency (not necessary if you already have Java)
yum -y install java-1.8.0-openjdk.x86_64

# make soffice available to your user
# option 1 (recommended): create symbolic link
ln -s /opt/libreoffice7.0/program/soffice /usr/sbin/soffice

# run LibreOffice for the first time, this will create the default home directory of LibreOffice
soffice

# CTRL-C to exit

# The following steps are OPTIONAL
# option 2 (alternative): add LibreOffice to the profile for your user (as it needs to be able to find soffice)
# if you did option 1, this is not necessary
vi /etc/profile
export PATH=$PATH:/opt/libreoffice7.0/program
source /etc/profile

# check the version of LibreOffice and try to run a conversion
soffice --version
soffice --headless --invisible --convert-to pdf --outdir /tmp /tmp/LibreOffice_7.0.6.2_Linux_x86-64_rpm/readmes/README_en-US

# if you get: Fontconfig warning: ignoring UTF-8: not a valid region tag
echo "$LC_CTYPE"
# |-> you probably have UTF-8 defined; unset it
export LC_CTYPE=""

# optional: cleanup LibreOffice install
# rm -rf LibreOffice_7.0.6.2_Linux_x86-64_rpm/
# rm -f LibreOffice_7.0.6_Linux_x86-64_rpm.tar.gz
Installation of Fonts
To install the most used Microsoft fonts, execute following commands:
rpm -i https://yum.oracle.com/repo/OracleLinux/OL7/developer_EPEL/x86_64/getPackage/cabextract-1.9-7.el7.x86_64.rpm
yum -y install rpm-build cabextract ttmkfdir fontconfig
rpm -i https://downloads.sourceforge.net/project/mscorefonts2/rpms/msttcore-fonts-installer-2.6-1.noarch.rpm
fc-cache -fv
If you need special characters or language support, make sure the necessary fonts and languages are on your system. For example to add Chinese support do:
yum install "@Chinese Support"
Further more if you want to install additional fonts here's a good link. Cloud Office Print Cloud API has Google Noto fonts installed.
Installing a font is nothing more than installing the font on your system.
For example on (RedHat) Linux, we copy the *.ttf files (or directory) to /usr/share/fonts/ and run fc-cache -f -v.
For barcodes, you could also choose to install a barcode font, for example Free 3of9 or dafont.com/3of9-barcode.font. Barcode fonts are more performant than images.
If you are using font awesome and using html tag or interactive reports/grid in Word, you will have to install the font-awesome desktop fonts in order to render the PDFs properly.
Activate and Manual Start Cloud Office Print
Cloud Office Print needs a valid license file. If Cloud Office Print doesn't find a license, it will run in Trial mode. You have all features when running in Trial mode, but Cloud Office Print will print a trial watermark on top of the document.
In order to activate Cloud Office Print, so there's no trial watermark:
- Run
./CloudOfficePrintLinux64 -a. - This will activate the software.
- You have to enter the email you registered with and it will try to generate the license key. The license key will be generated if you have an open connection to the internet. If there’s no internet connection, or something goes wrong with the activation, Cloud Office Print will generate a license request file. You can upload this license request file on your dashboard at cloudofficeprint.com. You can also contact support@cloudofficeprint.com and send this generated file as attachment. We’ll send you the license file per email.
- Exit Cloud Office Print.
To start Cloud Office Print:
- Go to the server directory.
- Run
./CloudOfficePrintLinux64 &.
On the first run of CloudOfficePrint a configuration file, cop_config.json, is created.
Customise the cop_config.json file to your needs. For example to change the port to a different port than the default 8010. See the Cloud Office Print Configuration section for more info.
If you encounter this error:
-------------------------------------------------
Error on Thu Feb 04 2016 19:33:35 GMT-0800 (PST)
-------------------------------------------------
listen EADDRINUSE
It means the port is already being used.
Start/Stop Cloud Office Print as a Service
On Linux 7 you can use systemd (systemctl) to start and stop services. For Red Hat and Oracle Enterprise Linux you can follow the below instructions.
As user root or sudo privileged user:
# create the cop user
sudo useradd cop
sudo groupadd cop
sudo usermod -a -G cop cop

# give the cop user the privileges to the /opt/cop directory
chown cop:cop /opt/cop -R

# create cop.service
cd /etc/systemd/system
vi cop.service
Paste the following in and adjust for your installation as required.
In this script, Cloud Office Print is installed in /opt/cop, run with the cop user which has as home directory /home/cop.
[Unit]
Description=Cloud Office Print
After=network.target

[Service]
Type=simple
User=cop
Group=cop

Environment=COP_HOME=/opt/cop/latest/server
Environment=COP_PROCESS_NAME=CloudOfficePrint
Environment=COP_EXECUTABLE_NAME=CloudOfficePrintLinux64

Environment=PATH=/usr/local/bin:/usr/bin:/usr/local/sbin:/usr/sbin:/bin/
Environment=HOME=/home/cop
SyslogIdentifier=cloudofficeprint
Restart=always
RestartSec=30
TimeoutStartSec=30
TimeoutStopSec=30

ExecStart=/usr/bin/env ${COP_HOME}/${COP_EXECUTABLE_NAME} -s ${COP_HOME}

ExecStop=/usr/bin/env pkill ${COP_PROCESS_NAME}

[Install]
WantedBy=multi-user.target
Reload the daemon.
systemctl daemon-reload
A simple setup is needed to install the version of cop in /opt/cop. When you install a new version just unzip in this directory. You will end up for example with the following directories v18.2, v19.3 and v21.1. Create in the directory /opt/cop a symbolic link to point to the latest version.
ln -s /opt/cop/v21.1.1 /opt/cop/latest
Suppose something is not working properly and you need to revert back to your previous version, all you need to do is to change the symbolic link to point to a previous version. For example:
unlink latest
ln -s /opt/cop/v21.1.1 /opt/cop/latest
As root:
start cop               : systemctl start cop
stop cop                : systemctl stop cop
status cop              : systemctl status cop
autostart at boot       : systemctl enable cop
remove autostart at boot: systemctl disable cop
Example output of systemctl status cop:
[root@s2s-proddb-03 system]# systemctl status cop.service
● cop.service - Cloud Office Print
   Loaded: loaded (/usr/lib/systemd/system/cop.service; disabled; vendor preset: disabled)
   Active: active (running) since Sat 2018-03-10 20:39:47 AEDT; 6s ago
Main PID: 28273 (CloudOfficePrint)
   CGroup: /system.slice/cop.service
           ├─28273 /opt/cop/latest/server/CloudOfficePrintLinux64 -p 8010 -s /opt/oracle/cop/latest/server
           ├─28283 /opt/cop/v3.4/server/CloudOfficePrintLinux64 --pkg-fallback --max_old_space_size=16384 /snapshot/cloudofficeprint/cop_server/node_modules/unitedcodes-startup-utils/sequentialConverter.js -d 0 --idleT...
           └─28288 /opt/cop/v3.4/server/CloudOfficePrintLinux64 --pkg-fallback --max_old_space_size=16384 /snapshot/cloudofficeprint/cop_server/cloudofficeprint.js -p 8010 -s /opt/oracle/cop/latest/server
Mar 10 20:39:47 http://proddb-032.acme.com systemd[1]: Started Cloud Office Print.
Mar 10 20:39:47 http://proddb-032.acme.com systemd[1]: Starting Cloud Office Print...
Mar 10 20:39:48 http://proddb-032.acme.com cloudofficeprint[28273]: Current license is activated to: xxxx@thiscompany.com
Mar 10 20:39:48 http://proddb-032.acme.com cloudofficeprint[28273]: The products activated are:
Mar 10 20:39:48 http://proddb-032.acme.com cloudofficeprint[28273]: Word
Mar 10 20:39:49 http://proddb-032.acme.com cloudofficeprint[28273]: Listening on port 8010
Mar 10 20:39:49 http://proddb-032.acme.com cloudofficeprint[28273]: COP 1 running
To view detailed logs of the service do:
journalctl -u cop.service
Installation on Windows
Download and Unzip File
Log in on cloudofficeprint.com and download the Linux version of Cloud Office Print.
Copy the zip you downloaded to the server where you want to run the Cloud Office Print Server.
Unzip the file in a directory of choice e.g. D:\cop.
If you're on Windows, you can choose for LibreOffice or MS Office. We recommend LibreOffice, but in case you want to use MS Office, make sure you have MS Office 2007 or higher installed and also install OfficetoPDF (direct download), which allows to run conversions from the command line.
Note: Place the OfficetoPDF executable location in the system PATH variable.
Install LibreOffice
In order for Cloud Office Print to convert PDFs it relies on LibreOffice (6 or higher) and Java (optional but necessary for PDF manipulations is wished), so both of those should be available on the server. You will find below step-by-step instructions how to verify if the pre-requisites are met and how to install those.
Verify if LibreOffice is already installed on your system:
C:> soffice --version
LibreOffice 7.0.6.2 64390860c6cd0aca4beafafcfd84613dd9dfb63a

C:> java -version
openjdk version "1.8.0_282"
OpenJDK Runtime Environment (build 1.8.0_282-b08)
OpenJDK 64-Bit Server VM (build 25.282-b08, mixed mode)
Installation steps for LibreOffice:
- Download the installer from: libreoffice.org/download/download.
- Run the installer (full details: libreoffice.org/get-help/install-howto/windows).
- Add the program folder from the installation folder into the system PATH variable.
Installation steps for Java:
- Download Oracle JDK or JRE from: oracle.com/java/technologies/javase-jre8-downloads.html.
- Run the installer (full details: java.com/en/download/help/windows_manual_download.html).
Activate and Manual Start Cloud Office Print
Cloud Office Print needs a valid license file. If Cloud Office Print doesn't find a license, it will run in Trial mode. You have all features when running in Trial mode, but Cloud Office Print will print a trial watermark on top of the document.
In order to activate Cloud Office Print, so there's no trial watermark:
- Open Windows Powershell or Command Prompt.
- Navigate to the location where the Cloud Office Print server is located.
- run
CloudOfficePrintWin64 -a. - You have to enter the email you registered with and it will try to generate the license key. The license key will be generated if you have an open connection to the internet. If there’s no internet connection, or something goes wrong with the activation, Cloud Office Print will generate a license request file. You can upload this license request file on your dashboard at cloudofficeprint.com. You can also contact support@cloudofficeprint.com and send this generated file as attachment. We’ll send you the license file per email.
- Exit Cloud Office Print.
To start Cloud Office Print:
- go to the server directory.
- run
CloudOfficePrintWin64.
On the first run of CloudOfficePrint, a configuration file, cop_config.json, is created. Customise the cop_config.json file to your needs. For example to change the port to a different port than the default 8010. See the Cloud Office Print Configuration section for more info.
Using Microsoft Office as PDF converter and Cloud Office Print as a Service
If you wish to use Microsoft office as PDF converter for your documents, some tweaks are necessary before CloudOfficePrint can be used or started as service.
32-Bit Windows
Directory Creation
Create a directory "Desktop" if it does not already exist under "C:\Windows\system32\config\systemprofile\Desktop"
DCOM Config
-
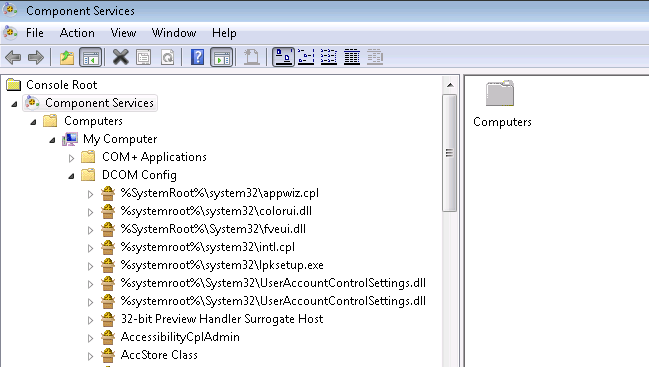
From Run (Windows + R), type dcomcnfg
-
Navigate to Component Services > Computers > My Computer > DCOM Config
-
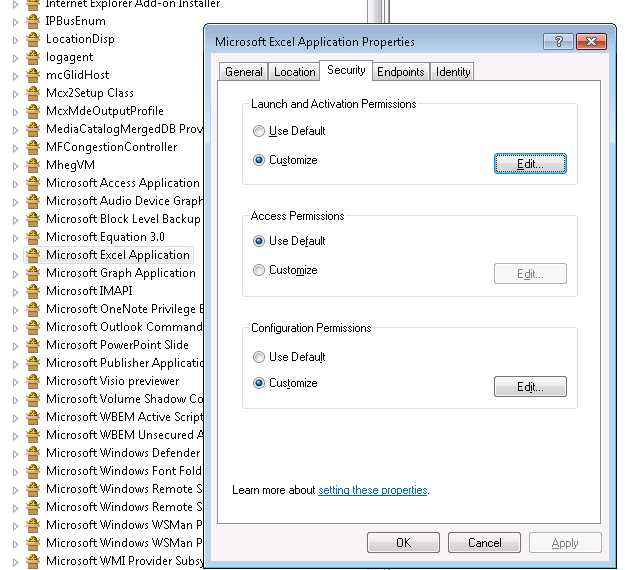
Locate "Microsoft Excel Application" and right click properties of it
-
Navigate to Security Tab and Customize the Launch and Activation Permissions and Edit
-
Check that no instances of excel.exe are running before changing the properties, either close the applications that are running the Excel or go to task manager and kill the excel.exe processes.
-
Add the current user (type the current user, click check names, and click ok) and grant permission for Local Launch and Local Activation
-
Go to Identity Tab and change the radio button to "The User"
-
Do the same for "Microsoft PowerPoint Slide".
-
Do the same for "Microsoft Word 97-2003 Document".
Setting Directory Permissions
-
Navigate to:
C:\\Windows\\System32\\config\\systemprofile\\AppData\\Roaming\\Microsoft. -
Right click and go to Properties
-
Under Security Tab add the current user and grant the Modify, Read & Execute, List Folder Content, Read, and Write permissions.
-
Do the same for
C:\\Windows\\Temp\\.
64-Bit Windows
Directory Creation
Create a directory "Desktop" if it does not already exist under:
C:\\Windows\\system32\\config\\systemprofile\\Desktop and
C:\\Windows\\SysWOW64\\config\\systemprofile\\Desktop.
DCOM Config
-
From Run (Windows + R), type dcomcnfg (if your Microsoft Office is 32 bit then open command line and change directory to "C:\Windows\SysWOW64" and run "mmc comexp.msc /32" command)
-
Navigate to Component Services > Computers > My Computer > DCOM Config
-
Locate "Microsoft Excel Application" and right click properties of it
-
Navigate to Security Tab and Customize the Launch and Activation Permissions and Edit
-
Check that no instances of excel.exe are running before changing the properties, either close the applications that are running the Excel or go to task manager and kill the excel.exe processes.
-
Add the current user (type the current user, click check names, and click ok) and grant permission for Local Launch and Local Activation
-
Go to Identity Tab and change the radio button to "The Interactive User" or "The Launching User" (automatic start)
-
Do the same for "Microsoft PowerPoint Slide".
- Do the same for "Microsoft 97-2003 Document".
Setting Directory Permissions
Navigate to:
-
C:\\Windows\\System32\\config\\systemprofile\\AppData\\Roaming\\Microsoft. -
Right click and go to Properties.
-
Under Security Tab add the current user and grant the Modify, Read & Execute, List Folder Content, Read, and Write permissions.
-
Do the same for:
C:\\Windows\\System32\\config\\systemprofile\\AppData\\Local\\Microsoft. -
Do the same for:
C:\\Windows\\Temp\\.
Running as Service in Windows
-
Navigate to WindowsService folder situated in the CloudOfficePrint folder.
-
Edit 1_SetupAsService.bat to include the full path to the executable CloudOfficePrintWin64.exe. Note that you can also add additional parameters for example for the port it should run on and the starting directory.
nssm.exe install CloudOfficePrint %0\..\..\CloudOfficePrintWin64.exe --port 8090 -s D:\cloudofficeprint
-
Run 1_SetupAsService.bat.
-
The service should be installed and can be seen in Services (Control Panel > Administrative Tools > Services).
-
To change how the CloudOfficePrint service starts you can change it from Services or start it manually via 2_StartService.bat (should be run as Administrator).
-
To check if the service has started, navigate to http://localhost:8010/
-
To stop the service run 3_StopService.bat as Administrator or stop it from Services.
-
To remove CloudOfficePrint as service run 4_RemoveService.bat.
-
The CloudOfficePrint service should now be removed from Services. If it says Disabled then it will be removed after the service has been stopped.
Make sure you restart Cloud Office Print after installing LibreOffice.
Note:
- We sometimes see LibreOffice doesn't generate the same PDF as MS Office is generating, but we found LibreOffice is becoming more and more inline, so we recommend using the latest version of LibreOffice.
- Depending on the version of LibreOffice converting to HTML from docx, xlsx, pptx might include the images as base64 or include a link.
Installation on Docker
Download the Cloud Office Print Docker Image
docker pull unitedcodes/cloudofficeprint
Activating Cloud Office Print the first time (Gold license only - not necessary for Enterprise license). This step is only needed once.
docker run -it \
--name cloudofficeprint \
--network=my_network \
-p 8010:8010 \
-v /docker/cloudofficeprint/:/cloudofficeprintstartup/ \
unitedcodes/cloudofficeprint \
-s /cloudofficeprintstartup/
-a
You can also build your own docker image. The dockerfile content are as follows:
FROM ubuntu:18.04
ARG email

EXPOSE 8010
RUN apt-get update && \
    apt-get install -y libreoffice && \
    apt-get install net-tools && \
    mkdir /CloudOfficePrint/ && \
    cd /CloudOfficePrint/ && \
    apt-get install -y wget && \
    apt-get install -y unzip && \
    wget https://s3-eu-west-1.amazonaws.com/cloudofficeprint/linux/cop_linux_latest.zip && \
    unzip cop_linux_latest.zip && \
    rm cop_linux_latest.zip && \
    version=$(ls -d */|head -n 1) && \
    mv $version/server/* ./ && \
    rm -r $version/ && \
    chmod u+x CloudOfficePrintLinux64 && \
    wget https://download.documentfoundation.org/libreoffice/stable/7.0.6/deb/x86_64/LibreOffice_7.0.6_Linux_x86-64_deb.tar.gz && \
    tar -xvf LibreOffice_7.0.6_Linux_x86-64_deb.tar.gz && \
    rm LibreOffice_7.0.6_Linux_x86-64_deb.tar.gz && \
    dpkg -i LibreOffice_7.0.6.2_Linux_x86-64_deb/DEBS/*.deb && \
    rm -r LibreOffice_7.0.6.2_Linux_x86-64_deb && \
    rm /usr/bin/soffice  && \
    ln -s /opt/libreoffice7.0/program/soffice /usr/bin/soffice  && \
    ./CloudOfficePrintLinux64 -a $email
ENTRYPOINT ["/CloudOfficePrint/CloudOfficePrintLinux64"]
In case you have an Enterprise License, add the cop.license file in the directory you specified, in below example it's /docker/cloudofficeprint/
Configure Cloud Office Print
Cloud Office Print can be configured through the cop_config.json file or through parameters when Cloud Office Print is being started.
Server Options
To view all available option, run ./CloudOfficePrintLinux64 -h
Following parameters can be used:
-a or --activate           : Activate the software
-r or --reactivate         : This reactivates the software.
-h or --help               : Show this menu
-p or --port               : For giving in the running port default: 8010
                             Example: CloudOfficePrint -p 5555
-s or --startat            : Directory to start at.
--license                  : The location of license file.
                                Default looks at the startup directory
--silent                   : Do everything quietly even start message
-v or --version            : Show the current version of Cloud Office Print
--verbose                  : Log what Cloud Office Print is currently doing.
--enable_printlog          : Log data about the printjobs to server_printjob.log.
--idle_timeout             : The maximum idle seconds for a request.
                                Default: 2 (pdf conversion time is considered idle)
-i or --instances          : The number of instances of Cloud Office Print to start
                                Giving 0 will start max instances available
--https_cert               : The location of the https certificate
--https_key                : The location of the https private key file
--https_port               : The port for the https server to run on.
                                Having a key/cert but no port will make the https
                                server use the port from -p/--port (or the default)
                                Example: .. -p 80 --https_port 443 -https_key ...
                                        http runs on port 80, https on port 443
                                Example: .. -p 80 --https_key ...
                                        https runs on port 80, no regular http
--ipwhitelist              : The file to read the IP whitelist from
                                If this parameter is empty, but 'ipwhitelist.txt' exists, ipwhitelist.txt will be used
                                File format: one IP (range) or subnetwork per line
                                Example: 127.0.0.1, abc::0-def::ffff
                                         10.0.0.0/8, 192.0..
--ipp_test                 : Tests the given ipp url and version by sending pdf and ps printouts
--pdf_error_threshold      : Set the maximum amount of retries for processing a pdf file.
--max_parallel_conversions : Set the maximum number of parallel conversions
                                (per converter). default: number of cores
--enable_save              : This enables the option write to disk
                                Default: outputfiles dir of Cloud Office Print directory
--enable_local_resources   : This enables accessing local files (e.g. templates)
--check_configuration      : Checks the configurations needed for Cloud Office Print to run
--deactivate               : This creates deactivation request file.
Cloud Office Print can also use a config file. These options can be saved in this config file. If no config file is there, Cloud Office Print generates the config file in the first run. This configuration file is of JSON format. The default configuration is as follows:
{
    "config": {
        "backup_pdf_temp_folder": "", // this folder will be taken into account if the provided temp folder is out of space.
        "default_converter": "libreoffice", //the default converter to use.
        "enable_local_resources": false, // if you want to save the templates on the machine itself and want to point to it or use images from local resource, you should enaable this.
        "enable_macro": false, // if you enable the macros while converting the docm,xlsm, pptm documents. please because as enabling macros might have security implications
        "enable_networklog": true, // enables the log of all he incmoing requests, including get requests to invalid urls.
        "enable_printlog": true, // enables the printjob log
        "enable_save": false, // if you'd like to save the output to server, you should enable this.
        "https_cert": "", // the https certificate to use when running in https mode.
        "https_key": "", // the https key to use when running in https mode
        "https_port": false, // enable and set this to a valid port number if you would like to run AIOP in BOTH http and https mode. If you would like to run only in https mode, set it to false and change the port through port option.
        "idle_timeout": 120, // this is the timeout given when a conversion occurs in seconds.
        "instances": 2, // the number of threads Cloud Office Print should run. This also determines the number of parallel requests Cloud Office Print can handle
        "ipwhitelist": "", // the file that contains the IP address that should be whitelisted.
        "java_command": "java", // the command to use to call java (necessary for PDF operations and manipulations)

        // By default Cloud Office Print will start a libreoffice process which is always listening for pdf conversion. This eradicates the startup and closing overhead,
        // however the conversion happens one at a time and thus is recommend for small pdf conversion. The following parameter can be used to control its behaviour.
        "libreoffice_idle_converter_timeout": 15, // The time in seconds to dedicate to one pdf conversion. If this times out and conversion couldn't be finished a dedicated Libreoffice process is started (timeout of that is controlled by idle_timeout)
        "libreoffice_idle_converters": 1, // The number of libreoffice idle converters to start.

        "license": "./cop.license", // The location of license file.
        "log_duration": 30, // Time in days to save the logs.
        "max_copies": 10, // The number of max copies that can be specfied in a request.
        "max_parallel_conversions": 0, // The number of parallel conversion that can be called at one moment. 0 -> unlimited.
        "max_preconversion_size": 300, // If the output file is large, the conversion process can be quite long. This limitation in mb can be used to save resource.
        "max_request_size": 200, // The max size of JSON that will be accepted by Cloud Office Print. In mb.
        "pdf_error_threshold": 3, // The number of retries until which Cloud Office Print will give back an error.
        "pdf_temp_folder": "", // The temp folder to use when Cloud Office Print calls the PDF converters. (can be a memory folder for faster conversion)
        "port": 8010, // The port on which Cloud Office Print should listen.
        "silent": false, // When this is true, Cloud Office Print will start without any logs.
        "startat": "./", // The locastion to start at. This might be handy if your resources are location somewhere else and can be references relative to this path.
        "verbose": false // When enabled this will log more info on what its doing.
    },
    "converters": {
        "abiword": {
            "command": "abiword --to={outputFormat} --to-name={outputFile} {inputFile}",
            "handlesParallel": false
        }
    },
    "pre_conversion_commands": {
        "echo": "echo \"{inputFile} with input format {inputFormat} has reached conversion stage.\" {p1} {p2} {p3} {p4}"
    },
    "post_conversion_commands": {
        "echo": "echo \"{inputFile} with input format {inputFormat} has been successfully converted.{p1} {p2} {p3} {p4} \" "
    },
    "post_merge_commands": {
        "echo": "echo \"{inputFile} with input format {inputFormat} has been successfully merged.{p1} {p2} {p3} {p4} \" "
    },
    "post_process_commands": {
        "echo": "echo \"{inputFile} with input format {inputFormat} has been successfully processed. Parameters passed {p1} {p2}\""
    }
}
Pre / Post commands
This allows for the users to use the converter of their choice. In the command section the following tags will be replaced:
- {outputFormat} : will be replaced by the output format needed, e.g: pdf.
- {outputFile} : the location and filename of the expected output (includes output extension and is absolute path, i.e contains outputDir).
- {inputFile} : the location where the file for the conversion is located (includes inputformat extenstion and is absolute path, i.e contains inputDir).
- {inputFormat} : the intput format of the input file, e.g. docx.
- {inputDir} : the directory where the inputFile is located.
- {outputDir} : the output dir where Cloud Office Print expects the output PDF (will always be the same as inputDir).
The other option handlesParallel should be true if the specified custom converter is capable of handling multiple PDF conversions at the same time. If a custom converter is used and the specified converter cannot handle parallel conversion, then the conversions are placed in a queue and called on first come first serve basis (even when multiple instances of Cloud Office Print are running).
We have introduced other hooking points where you can modify the given input file. The commands that should be run before the conversion should be provided with pre_conversion_commands. The post_conversion_commands object specifies the commands that can be called after conversion. The post_merge_commands object specifies the commands that can be run after the merging has happened. Please note that there is no pre_merge_commands object since this is the same as post_conversion_commands.
Please note that if a command is specified in a request for pre_conversion_commands and post_conversion_commands, then these commands are called for all the files (i.e prepend and append files).
IP Whitelisting
The ipwhitelist option should provide the location of the file containing the list of IP addresses that need to be whitelisted separated by a newline.
Allowed Patterns
    IP (IPv4/IPv6)
        Regular IPv4: 10.0.0.0
        Wildcard IPv4: 10.0.0.* or even 10.*.0.*
        Regular IPv6: 2001:0db8:85a3:0000:0000:8a2e:0370:7334
        Shortened IPv6: 2001:db8:85a3::8a2e:0370:7334 or ::abc or abc::
        Wildcard IPv6: 2001::* or even 2001::*:abc:*
        Not allowed: 10.0.1*.0 or 2001::a*c
    IP Range
        IPv4: 10.0.0.0-10.1.2.3
        IPv6: 2001::abc-2001::1:ffff
        Note: Left side has to be "lower" than the right side
    IP Subnetwork
        IPv4: 10.0.0.0/16
        IPv6: 2001::/64
HTTPS Configuration
Cloud Office Print can be configured as an HTTPS server. It requires a crt file and its private key file.
A self-signed certificate and key can also be used. The certificate can be generated by using openssl command:
openssl req -x509 -newkey rsa:2048 -keyout keytmp.pem -out cop.crt -days 365
openssl rsa -in keytmp.pem -out cop.key
Given cop.crt certificate file and cop.key private key file Cloud Office Print can be started with:
CloudOfficePrint --https_cert cop.crt --https_key cop.key
The port number can also be specified with the --https_port argument. If this is provided the server will run in HTTP and HTTPS mode.
You should see the following when started successfully on the console.
Starting HTTP and HTTPS on port 8010 and 443
Cloud Office Print 1 (HTTP) running
Cloud Office Print 1 (HTTPS) running
Please note that the certificate validation is done by the client. If you are using a self-signed certificate and visit the https location with browser, you will get a security warning (see below).
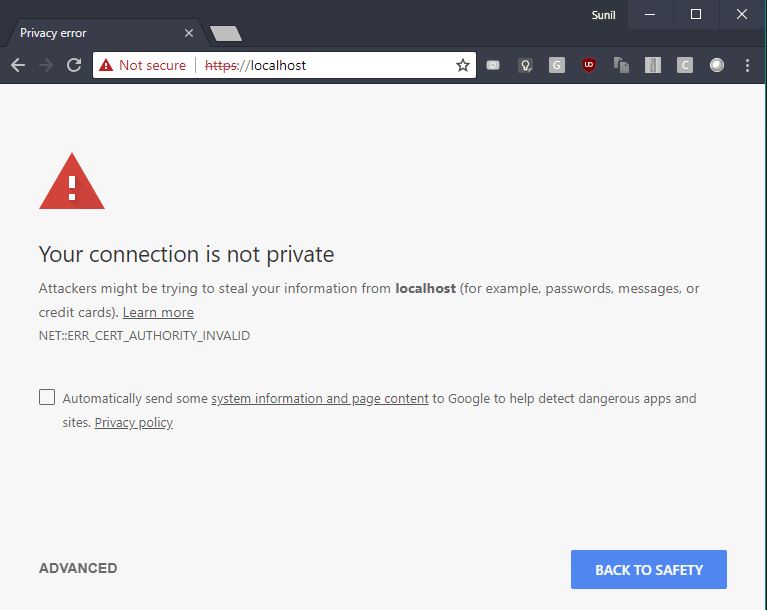
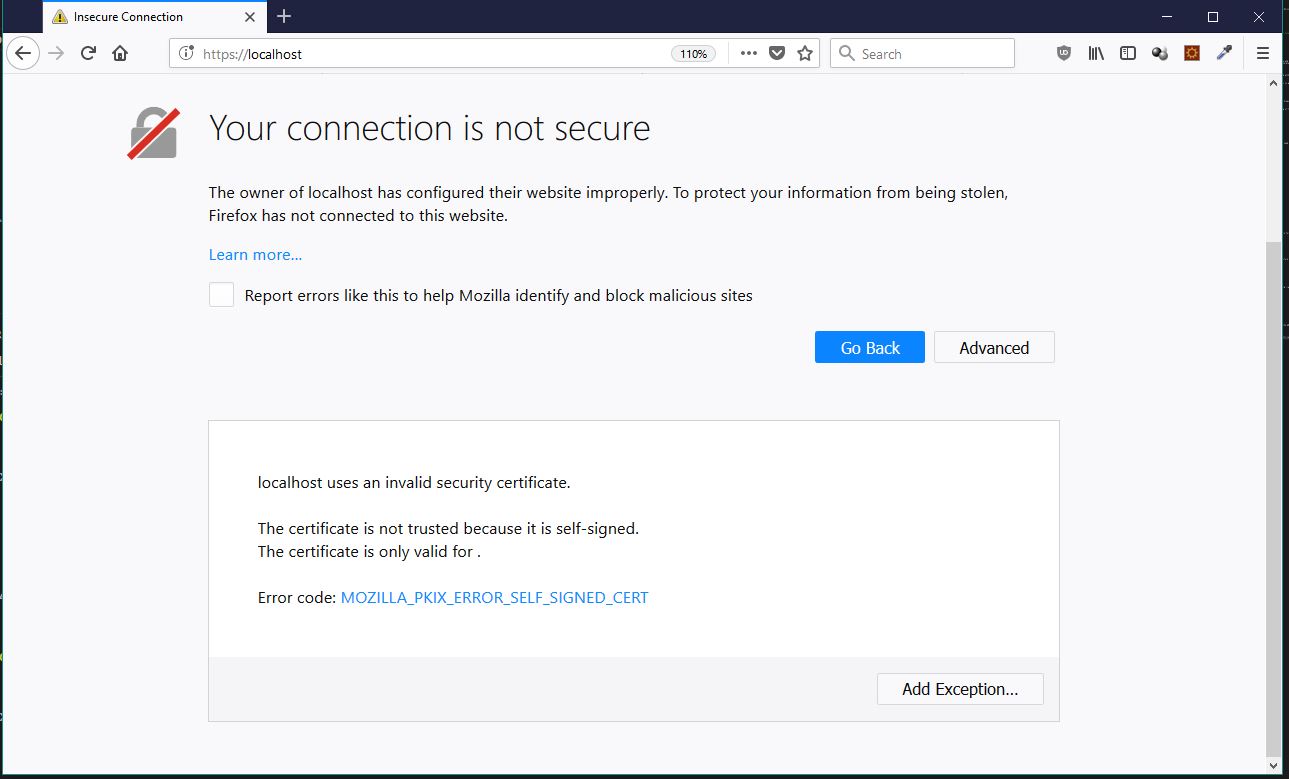
You can configure the browsers to trust the self-signed certificate by adding it to the security exception.
SSL with Reverse Proxy
For older versions however we recommend setting up an Apache Reverse Proxy which is doing the SSL in front of Cloud Office Print. From Apache to Cloud Office Print it would be unencrypted, but if it’s on the same machine as Apache and the port of Cloud Office Print is not open and only accessible by localhost, we believe you're safe.
To prevent access to Cloud Office Print from other than the Apache Reverse Proxy, you can do (on Linux):
- app.zerossl.com
- support.oracle.com/epmos/faces/DocumentDisplay?_afrLoop=61425989509530&parent=EXTERNAL_SEARCH&sourceId=HOWTO&id=2617046.1&_afrWindowMode=0&_adf.ctrl-state=1bw4kcgqh3_4
- thegeekdiary.com/how-to-open-a-ports-in-centos-rhel-7/
firewall-cmd --zone=public --add-port=8010/tcp --permanent
iptables -A INPUT -p tcp --dport 8010 -s 127.0.0.0/8 -j ACCEPT
iptables -A INPUT -p tcp --dport 8010 -j DROP
(instead of DROP you can use REJECT too)
So that would mean only a program on localhost (like Apache) can connect to port 8010, all others are rejected.
Testing the Connection to Cloud Office Print
Make sure the application can connect to the port where Cloud Office Print is running. If not, open the port so the application can connect to the webserver:port (note you don't need to open it up to everybody, just the application is fine)
For example by running curl webserver:port (curl can be downloaded for free for windows via curl.haxx.se/download.html#Win64)
$ curl 127.0.0.1:8010
If you access the port running Cloud Office Print it should return a webpage with a web-editor:
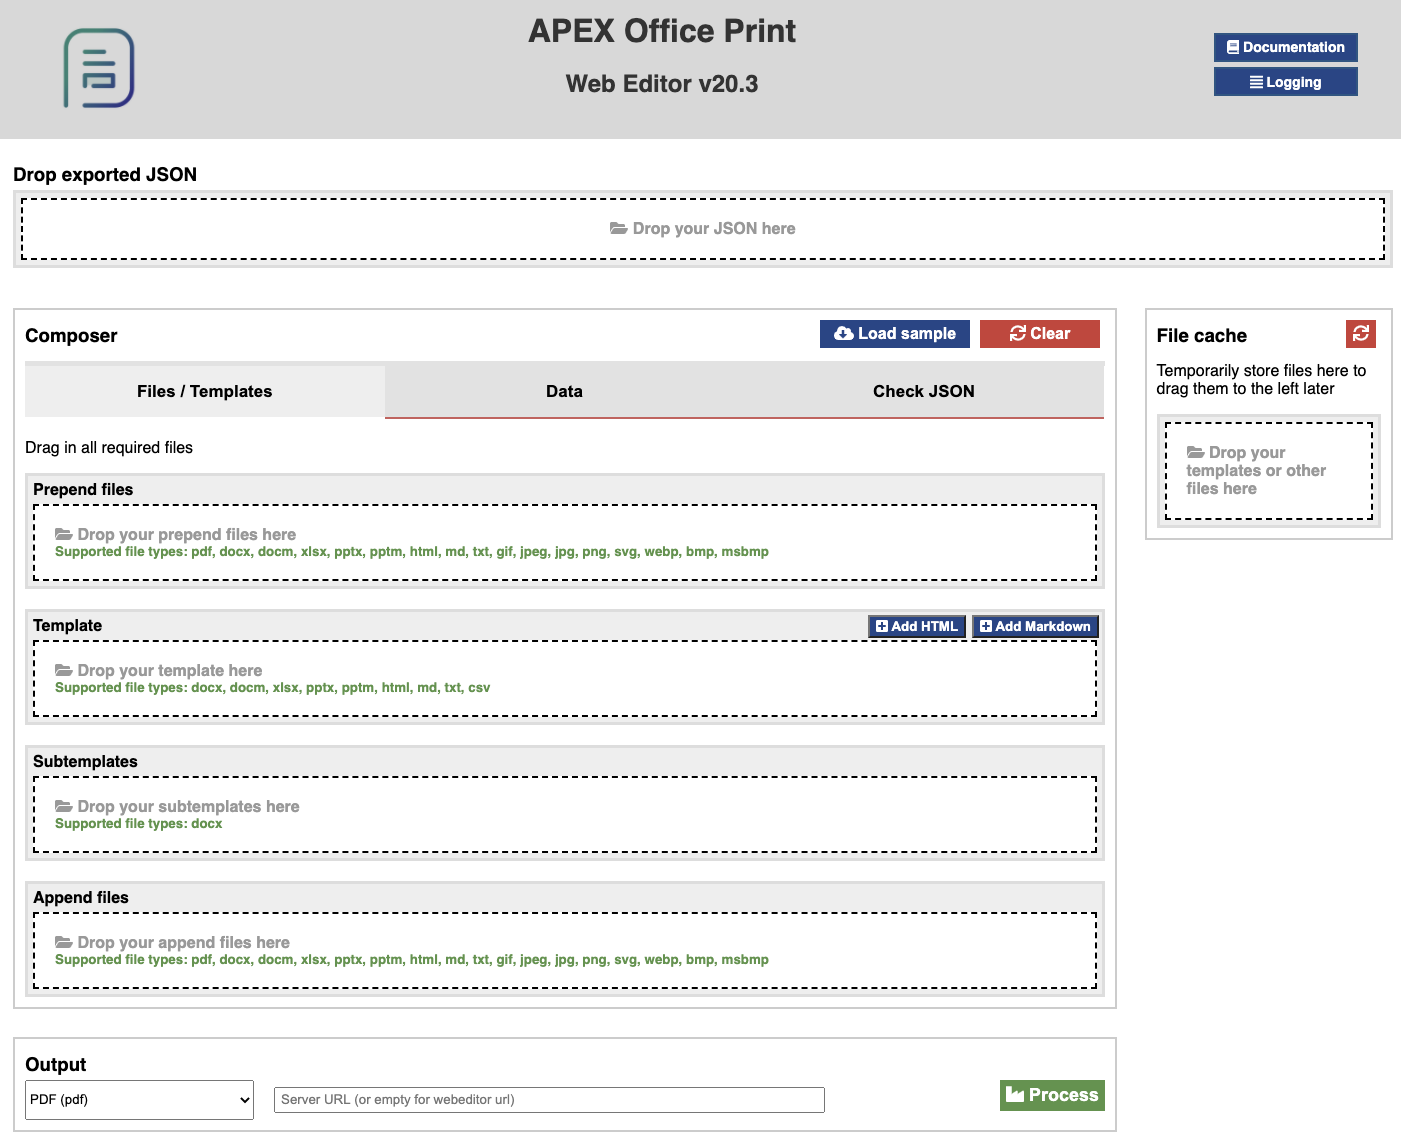
Here you can check if the installation was successful. You can load sample documents using the Load Sample button and clicking on the desired template type. Please check if the PDF conversion is working by first selecting the Template Type and then changing the Output field to PDF.
If you are connected to your web server using PuTTy or any other SSH client, you can enable X11 forwarding to run a web browser.
If you do not have a web browser installed on the server or are sshing from a remote location you can also enable port forwarding:
$ ssh -N -L 8010:remote.address:8080 remote.address
After this you should be able to go to a local web browser and access the same page with the following url: http://localhost:8010/.
Installation FAQ
What kind information is sent while activation?
When you try to activate the product, Cloud Office Print will ask for the registered email. Afterwards it looks at the UUID/GUID of the machine, this is:
- For Windows:
MachineGuidkey in registryHKEY_LOCAL_MACHINE\SOFTWARE\Microsoft\Cryptography. - For Linux:
/var/lib/dbus/machine-id.
The machine id is then hashed using sha-256.
Since SHA-256 is a one way function, it is impossible to derive the actual machine id from the given hash. No actual IP address, hostname, serial number, MAC address or any other hardware information are exposed.
The following content after encryption is sent to the Cloud Office Print license server:
{
    "email": "provided-registered-email",
    "mid": "sha-256 hashed machine-id",
    "version": "Cloud Office Print version getting activated"
}
Does Cloud Office Print on-prem version require internet access to activate/run?
During the activation, Cloud Office Print will try to connect to our license server. If this fails, Cloud Office Print will generate a license request file that can be uploaded to our website in order to get back the license file. This license file should be placed in the same folder as the Cloud Office Print executable.
In short, Cloud Office Print does not require internet access to be activated and to run.
High Available Configuration of Cloud Office Print
There are multiple ways to achieve high availability.
Application Level
First of all you can run Cloud Office Print in multiple instance using -i argument. Running in -i 0 will spawn a number of Cloud Office Print instances equal to the available cores of the system. Cloud Office Print itself has a manager built in. If one of the instances for some reason should exit another one will be started. This is equivalent to PM from node.js
Server level
Here you can run multiple servers and put a load balancer which will divert the call between multiple running servers. Ideally you can use AWS auto scaling like we do. This will spin up a new instance depending on the load. Please note that if you use Cloud Office Print on this way, you will need licenses for the max number of instance you would like to spawn.
Our Cloud Office Print Cloud for example is configured to run 4 instances, together with auto scaling for up to 4 machines. The new machines will be started in one of the 3 EU regions provided by AWS. This is to ensure that clients will still have access to our API in case of regional blackouts.
Cloud Plug-in and PL/SQL API
Finally you can set a fallback url which can point to our Cloud Office Print Cloud server or a server running in a different region when the primary URL fails.
Now the questions is how available you want Cloud Office Print to be :)
Security Best Practices
These security best practices don't only apply to Cloud Office Print, but also to any other software application.
-
Create a new user specific to run the Cloud Office Print SERVER, e.g. give only the necessary privileges that is required: access to incoming requests on the given port and the ability to run soffice. Or run Cloud Office Print inside a docker instance.
-
Setup the firewall so that only the database server can connect to the Cloud Office Print Server port OR use the IP whitelist feature of Cloud Office Print to only allow access from the IP of the database server
-
Configure HTTPS either using a reverse proxy or let Cloud Office Print run in HTTPS mode, see HTTPS Configuration section