SpaceX Example
In this file we are going to show you how you can use the Cloud Office Print SDKs to generate an output file using a template and data to fill the template. The general approach is to create a template file in which you want the data to appear, then process the data with the SDK and finally let Cloud Office Print do the work to merge your template with the data.
In this example, we are going to use SpaceX data to fill a template we are going to made. The SpaceX data can be received by sending a HTTP-request to an API. The (non-official) API used in this example is https://docs.spacexdata.com/.
Normally you will know the data you will be using to fill in the template, but for this example, we are going to start with a brief overview of the data we will be using. Then we will create a template. Then we will get the data from the spacexdata-API and process this data with an SDK. Finally we send the template together with the data to a Cloud Office Print server and save the response into our output file.
Input Data (API)
The data we use comes from https://docs.spacexdata.com/. More specifically we will use SpaceX data about their company, rockets, dragons, launch pads, landing pads and ships that assist SpaceX launches. Let us have a look at the available data for the different components.
Company
Link: https://api.spacexdata.com/v3/info
The response is a JSON with information about the company SpaceX:
{
    "name": "SpaceX",
    "founder": "Elon Musk",
    "founded": 2002,
    "employees": 7000,
    "vehicles": 3,
    "launch_sites": 3,
    "test_sites": 1,
    "ceo": "Elon Musk",
    "cto": "Elon Musk",
    "coo": "Gwynne Shotwell",
    "cto_propulsion": "Tom Mueller",
    "valuation": 27500000000,
    "headquarters": {
        "address": "Rocket Road",
        "city": "Hawthorne",
        "state": "California"
    },
    "links": {
        "website": "https://www.spacex.com/",
        "flickr": "https://www.flickr.com/photos/spacex/",
        "twitter": "https://twitter.com/SpaceX",
        "elon_twitter": "https://twitter.com/elonmusk"
    },
    "summary": "SpaceX designs, manufactures and launches advanced rockets and spacecraft. The company was founded in 2002 to revolutionize space technology, with the ultimate goal of enabling people to live on other planets."
}
Rockets
Link: https://api.spacexdata.com/v4/rockets
The response is a JSON array with information about all the rockets. One element of that array looks like this:
{
    "height": {
        "meters": 22.25,
        "feet": 73
    },
    "diameter": {
        "meters": 1.68,
        "feet": 5.5
    },
    "mass": {
        "kg": 30146,
        "lb": 66460
    },
    "first_stage": {
        "thrust_sea_level": {
            "kN": 420,
            "lbf": 94000
        },
        "thrust_vacuum": {
            "kN": 480,
            "lbf": 110000
        },
        "reusable": false,
        "engines": 1,
        "fuel_amount_tons": 44.3,
        "burn_time_sec": 169
    },
    "second_stage": {
        "thrust": {
            "kN": 31,
            "lbf": 7000
        },
        "payloads": {
            "composite_fairing": {
                "height": {
                    "meters": 3.5,
                    "feet": 11.5
                },
                "diameter": {
                    "meters": 1.5,
                    "feet": 4.9
                }
            },
            "option_1": "composite fairing"
        },
        "reusable": false,
        "engines": 1,
        "fuel_amount_tons": 3.38,
        "burn_time_sec": 378
    },
    "engines": {
        "isp": {
            "sea_level": 267,
            "vacuum": 304
        },
        "thrust_sea_level": {
            "kN": 420,
            "lbf": 94000
        },
        "thrust_vacuum": {
            "kN": 480,
            "lbf": 110000
        },
        "number": 1,
        "type": "merlin",
        "version": "1C",
        "layout": "single",
        "engine_loss_max": 0,
        "propellant_1": "liquid oxygen",
        "propellant_2": "RP-1 kerosene",
        "thrust_to_weight": 96
    },
    "landing_legs": {
        "number": 0,
        "material": null
    },
    "payload_weights": [
        {
            "id": "leo",
            "name": "Low Earth Orbit",
            "kg": 450,
            "lb": 992
        }
    ],
    "flickr_images": [
        "https://imgur.com/DaCfMsj.jpg",
        "https://imgur.com/azYafd8.jpg"
    ],
    "name": "Falcon 1",
    "type": "rocket",
    "active": false,
    "stages": 2,
    "boosters": 0,
    "cost_per_launch": 6700000,
    "success_rate_pct": 40,
    "first_flight": "2006-03-24",
    "country": "Republic of the Marshall Islands",
    "company": "SpaceX",
    "wikipedia": "https://en.wikipedia.org/wiki/Falcon_1",
    "description": "The Falcon 1 was an expendable launch system privately developed and manufactured by SpaceX during 2006-2009. On 28 September 2008, Falcon 1 became the first privately-developed liquid-fuel launch vehicle to go into orbit around the Earth.",
    "id": "5e9d0d95eda69955f709d1eb"
}
Dragons
Link: https://api.spacexdata.com/v4/dragons
The response is a JSON array with information about all the dragons. One element of that array looks like this:
{
    "heat_shield": {
        "material": "PICA-X",
        "size_meters": 3.6,
        "temp_degrees": 3000,
        "dev_partner": "NASA"
    },
    "launch_payload_mass": {
        "kg": 6000,
        "lb": 13228
    },
    "launch_payload_vol": {
        "cubic_meters": 25,
        "cubic_feet": 883
    },
    "return_payload_mass": {
        "kg": 3000,
        "lb": 6614
    },
    "return_payload_vol": {
        "cubic_meters": 11,
        "cubic_feet": 388
    },
    "pressurized_capsule": {
        "payload_volume": {
            "cubic_meters": 11,
            "cubic_feet": 388
        }
    },
    "trunk": {
        "trunk_volume": {
            "cubic_meters": 14,
            "cubic_feet": 494
        },
        "cargo": {
            "solar_array": 2,
            "unpressurized_cargo": true
        }
    },
    "height_w_trunk": {
        "meters": 7.2,
        "feet": 23.6
    },
    "diameter": {
        "meters": 3.7,
        "feet": 12
    },
    "first_flight": "2010-12-08",
    "flickr_images": [
        "https://i.imgur.com/9fWdwNv.jpg",
        "https://live.staticflickr.com/8578/16655995541_078768dea2_b.jpg",
        "https://farm3.staticflickr.com/2815/32761844973_4b55b27d3c_b.jpg",
        "https://farm9.staticflickr.com/8618/16649075267_d18cbb4342_b.jpg"
    ],
    "name": "Dragon 1",
    "type": "capsule",
    "active": true,
    "crew_capacity": 0,
    "sidewall_angle_deg": 15,
    "orbit_duration_yr": 2,
    "dry_mass_kg": 4200,
    "dry_mass_lb": 9300,
    "thrusters": [
        {
            "type": "Draco",
            "amount": 18,
            "pods": 4,
            "fuel_1": "nitrogen tetroxide",
            "fuel_2": "monomethylhydrazine",
            "isp": 300,
            "thrust": {
                "kN": 0.4,
                "lbf": 90
            }
        }
    ],
    "wikipedia": "https://en.wikipedia.org/wiki/SpaceX_Dragon",
    "description": "Dragon is a reusable spacecraft developed by SpaceX, an American private space transportation company based in Hawthorne, California. Dragon is launched into space by the SpaceX Falcon 9 two-stage-to-orbit launch vehicle. The Dragon spacecraft was originally designed for human travel, but so far has only been used to deliver cargo to the International Space Station (ISS).",
    "id": "5e9d058759b1ff74a7ad5f8f"
}
Launch Pads
Link: https://api.spacexdata.com/v4/launchpads
The response is a JSON array with information about all the launchpads. One element of that array looks like this:
{
    "images": {
        "large": ["https://i.imgur.com/7uXe1Kv.png"]
    },
    "name": "VAFB SLC 3W",
    "full_name": "Vandenberg Space Force Base Space Launch Complex 3W",
    "locality": "Vandenberg Space Force Base",
    "region": "California",
    "timezone": "America/Los_Angeles",
    "latitude": 34.6440904,
    "longitude": -120.5931438,
    "launch_attempts": 0,
    "launch_successes": 0,
    "rockets": ["5e9d0d95eda69955f709d1eb"],
    "launches": [],
    "details": "SpaceX's original west coast launch pad for Falcon 1. It was used in a static fire test but was never employed for a launch, and was abandoned due to range scheduling conflicts arising from overflying other active pads.",
    "status": "retired",
    "id": "5e9e4501f5090910d4566f83"
}
Landing Pads
Link: https://api.spacexdata.com/v4/landpads
The response is a JSON array with information about all the landpads. One element of that array looks like this:
{
    "images": {
        "large": ["https://i.imgur.com/KHBk6jO.png"]
    },
    "name": "LZ-1",
    "full_name": "Landing Zone 1",
    "type": "RTLS",
    "locality": "Cape Canaveral",
    "region": "Florida",
    "latitude": 28.485833,
    "longitude": -80.544444,
    "landing_attempts": 18,
    "landing_successes": 17,
    "wikipedia": "https://en.wikipedia.org/wiki/Landing_Zones_1_and_2",
    "details": "SpaceX's first east coast landing pad is Landing Zone 1, where the historic first Falcon 9 landing occurred in December 2015. LC-13 was originally used as a launch pad for early Atlas missiles and rockets from Lockheed Martin. LC-1 was later expanded to include Landing Zone 2 for side booster RTLS Falcon Heavy missions, and it was first used in February 2018 for that purpose.",
    "launches": [
        "5eb87cefffd86e000604b342",
        "5eb87cf9ffd86e000604b349",
        "5eb87cfeffd86e000604b34d",
        "5eb87d01ffd86e000604b350",
        "5eb87d03ffd86e000604b352",
        "5eb87d07ffd86e000604b356",
        "5eb87d09ffd86e000604b358",
        "5eb87d0effd86e000604b35c",
        "5eb87d10ffd86e000604b35e",
        "5eb87d13ffd86e000604b360",
        "5eb87d26ffd86e000604b371",
        "5eb87d2dffd86e000604b376",
        "5eb87d35ffd86e000604b37a",
        "5eb87d36ffd86e000604b37b",
        "5eb87d42ffd86e000604b384",
        "5eb87d47ffd86e000604b38a",
        "5f8399fb818d8b59f5740d43",
        "600f9b6d8f798e2a4d5f979f"
    ],
    "status": "active",
    "id": "5e9e3032383ecb267a34e7c7"
}
Ships
Link: https://api.spacexdata.com/v4/ships
The response is a JSON array with information about all the ships. One element of that array looks like this:
{
    "legacy_id": "AMERICANCHAMPION",
    "model": null,
    "type": "Tug",
    "roles": ["Support Ship", "Barge Tug"],
    "imo": 7434016,
    "mmsi": 367020820,
    "abs": 571252,
    "class": 7604342,
    "mass_kg": 266712,
    "mass_lbs": 588000,
    "year_built": 1976,
    "home_port": "Port of Los Angeles",
    "status": "",
    "speed_kn": null,
    "course_deg": null,
    "latitude": null,
    "longitude": null,
    "last_ais_update": null,
    "link": "https://www.marinetraffic.com/en/ais/details/ships/shipid:434663/mmsi:367020820/imo:7434016/vessel:AMERICAN_CHAMPION",
    "image": "https://i.imgur.com/woCxpkj.jpg",
    "launches": ["5eb87cdeffd86e000604b330", "5eb87cdfffd86e000604b331"],
    "name": "American Champion",
    "active": false,
    "id": "5ea6ed2d080df4000697c901"
}
Template
Now we will build the template. We can create templates in different file extensions, namely docx, xlsx, pptx, html, md, txt and csv. In this example we will build a template of filetype pptx, xlsx and docx. The template has to follow a specific structure which can be found at the official Cloud Office Print documentation: https://www.cloudofficeprint.com/docs/.
pptx
We will build the template in Google Slides. After choosing a pretty theme, we create the title slide. On this slide, we want the title of our presentation and the source where we got the data from. The title slide looks like this:

Here we encounter our first placeholder/tag: {*data_source}. Tags are defined by surrounding a variable name with curly brackets. This is the way we let the Cloud Office Print server know that data needs to replace this placeholder. We will see what that data is in the section Process input data. In this specific case, we used a hyperlink-tag {*hyperlink}.
Note: to minimize the modifications to the input data (see Input Data (API)), it is important to use as variable names the keys available in the input data if possible.
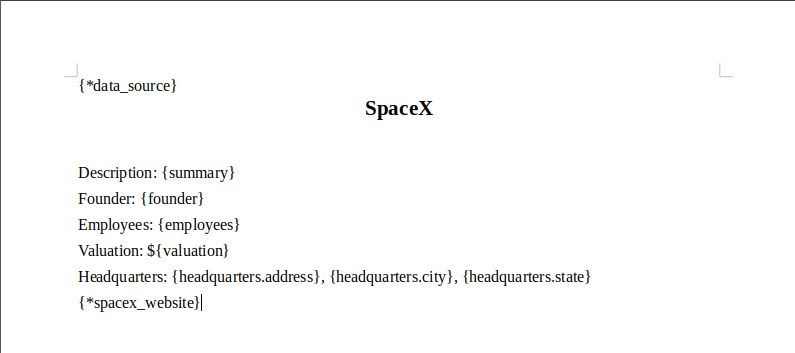
Next we want a slide that gives information about the company itself:
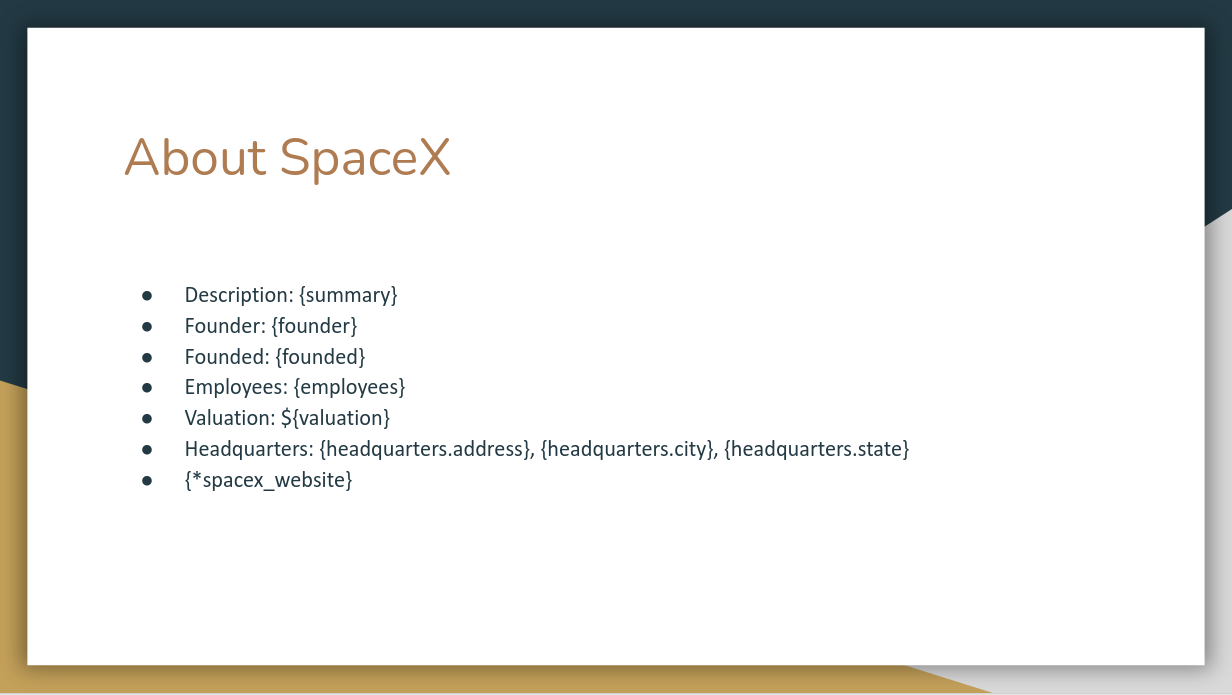
Again, the placeholders will be replaced with data by the Cloud Office Print server. Since the data given to the Cloud Office Print server will be in JSON-format (see Process input data), it is possible to reach a subfield of an entry by using entry.subfield.
So if headquarters is a JSON object like this:
"headquarters": {
    "address": "",
    "city": "",
    "state": ""
}
we can access the field address by doing headquarters.address, as can be seen on the slide. Lastly, we again use a hyperlink tag {*spacex_website}. The other tags are 'normal' tags in the sense that they will just be replaced by a value.
Now that the general information is provided in the presentation, we want some slides with information about the rockets, dragons, launch pads, landing pads and ships. This is shown in the next sections.
Rockets
First we want to have a general slide for the rockets with a description:
Then we want to have a slide for each rocket with information about this rocket. Since all rockets have the same parameters (such as height, diameter, mass etc.), we want to specify one template slide and use this for each rocket. This template slide looks like this:
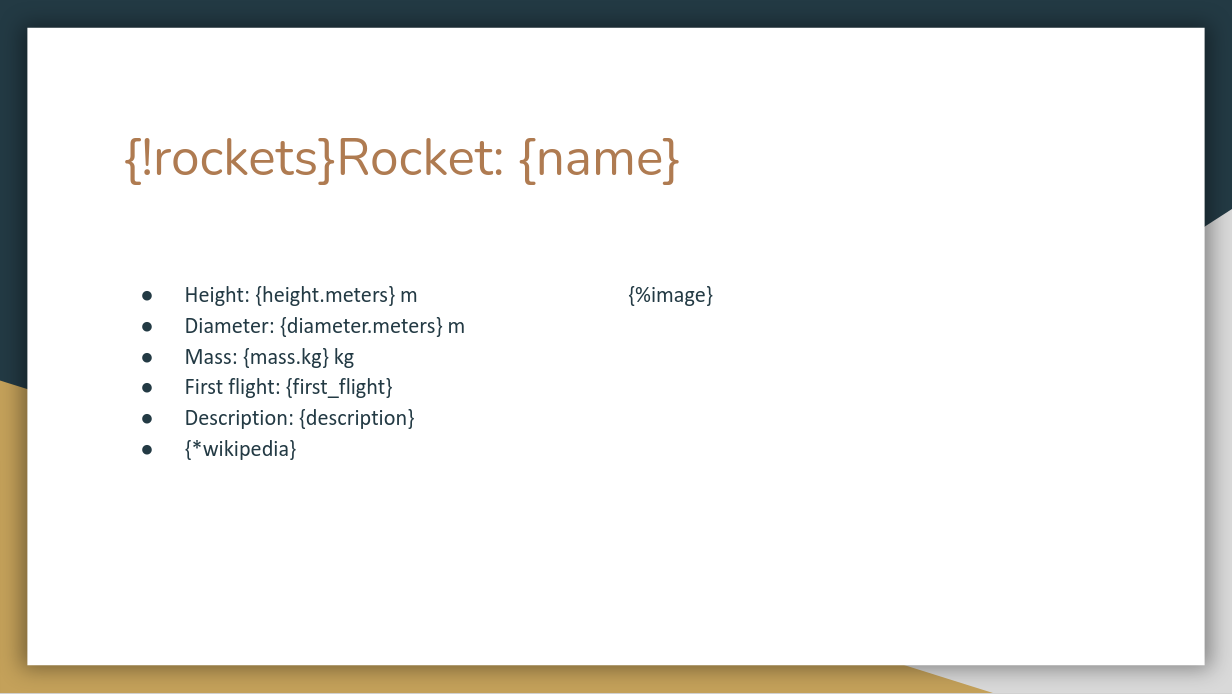
The thing of replicating a certain template slide for each object in a list is exactly what the first tag {!rockets} is for. For each rocket in the rockets-array (provided in the data, see Process input data), this slide is repeated. Another new tag is the {%image}-tag. This tag is used to insert an image at this place. We have already covered the other types of tags on this slide.
It might be interesting to plot the cost per launch for each of the rockets on a chart. This is the slide used for that:
The tag {$rockets_chart} is used to insert a chart at the place of this placeholder. The data for the chart can be generated using the SDK.
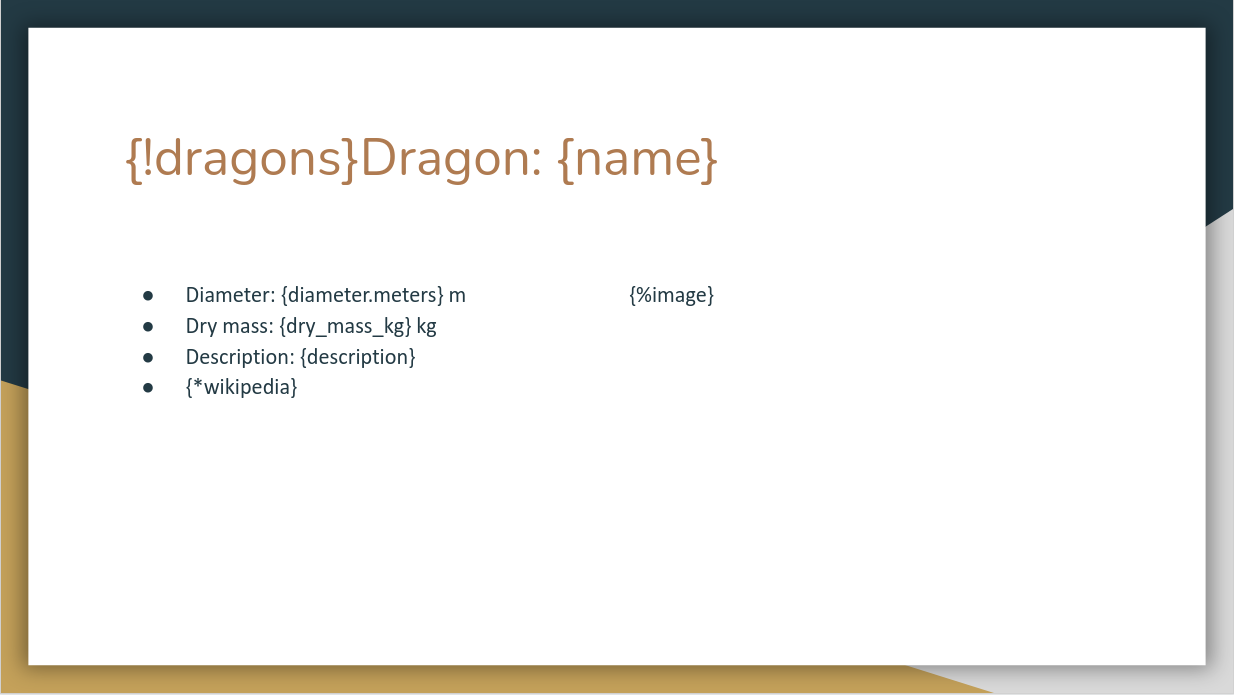
Dragons
Similar to the section Rockets, we can add the slides for the SpaceX-dragons. The slides used are:
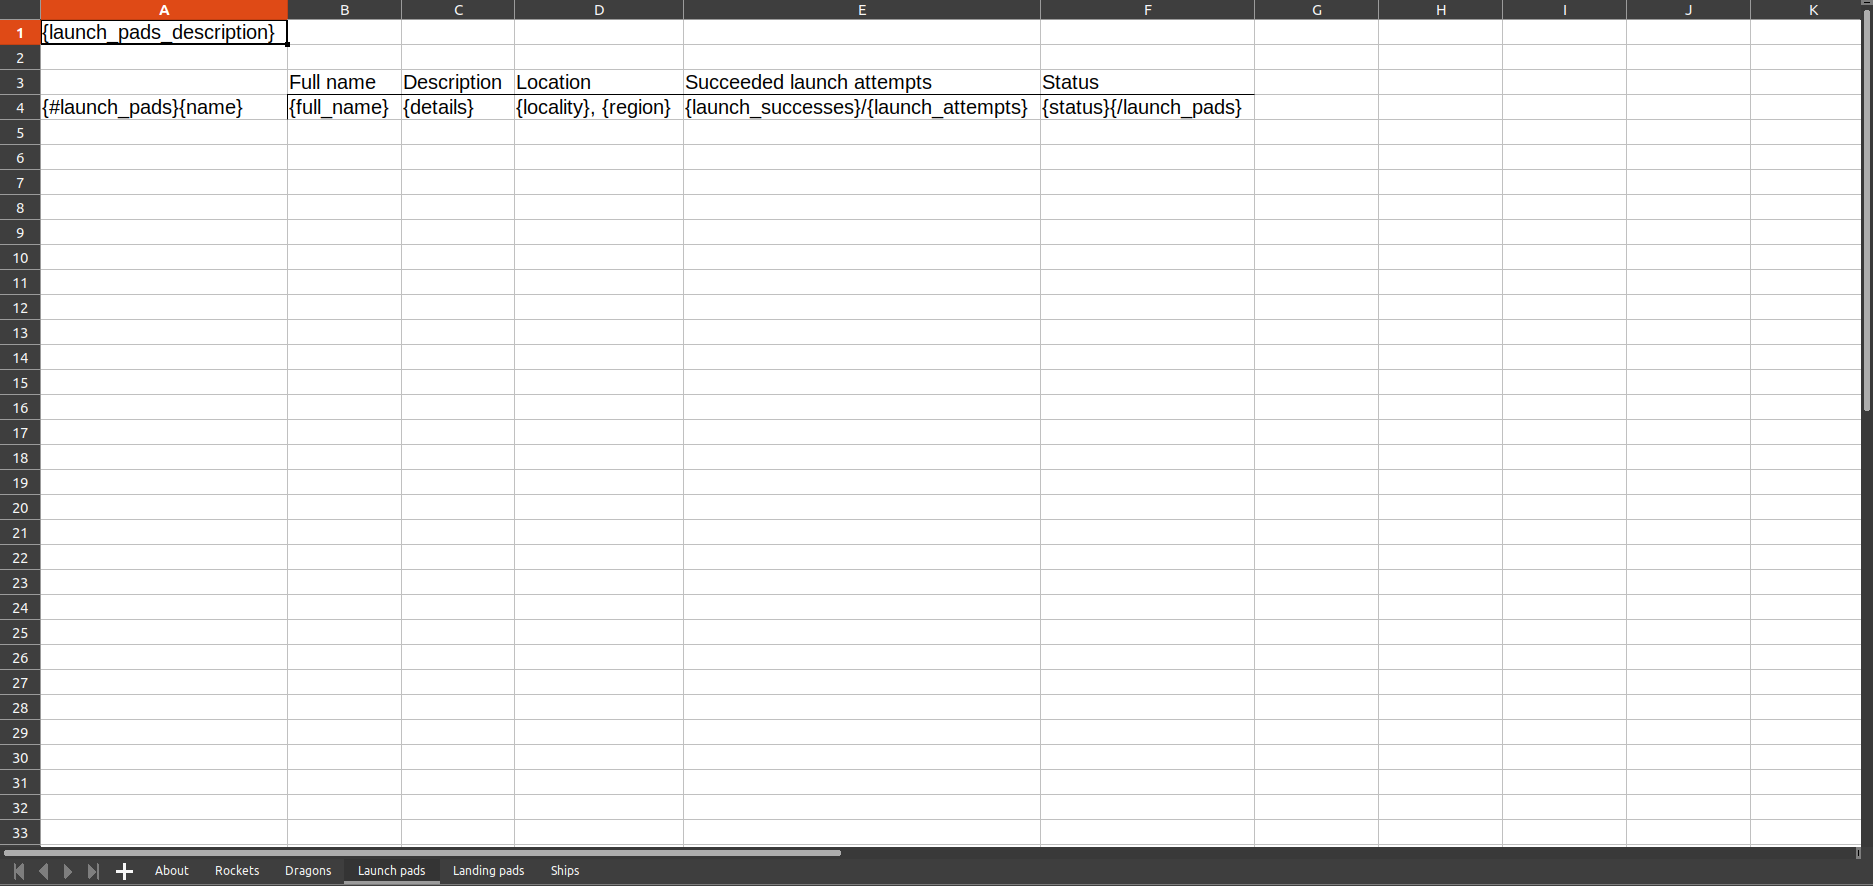
Launch Pads


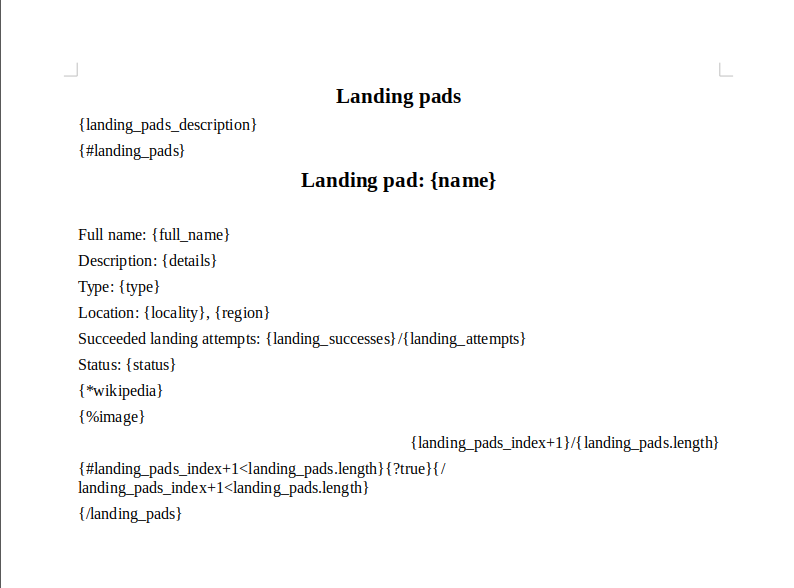
Landing Pads
Ships

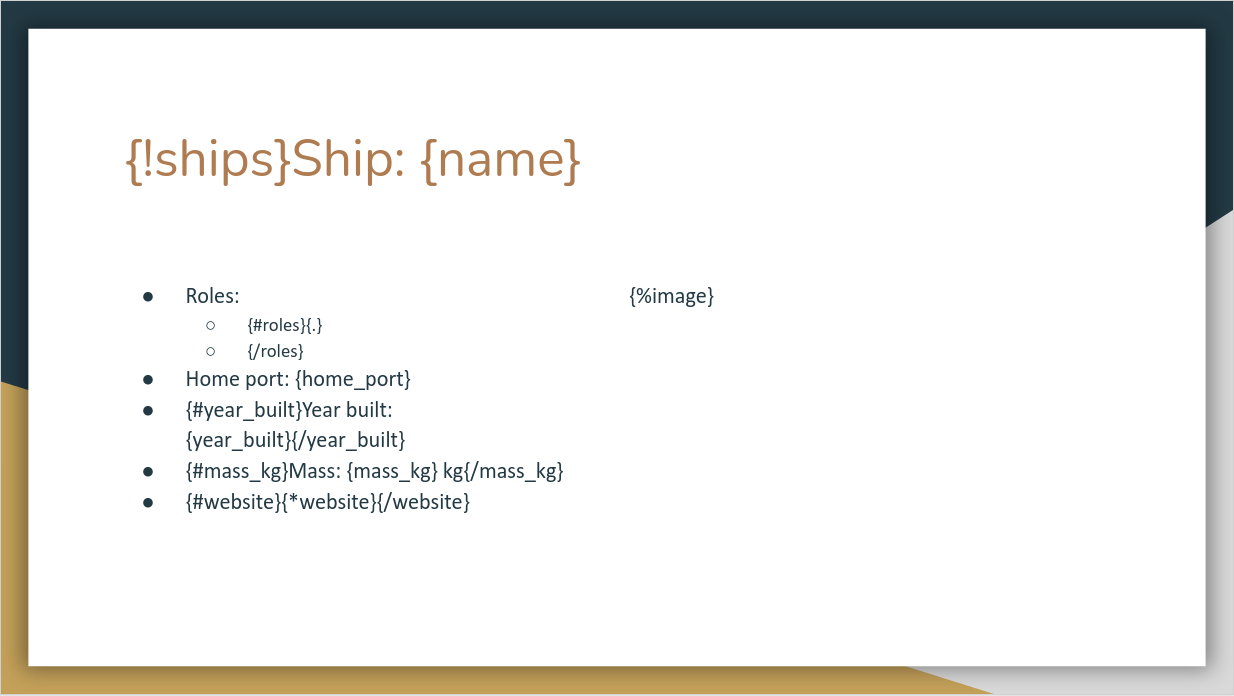
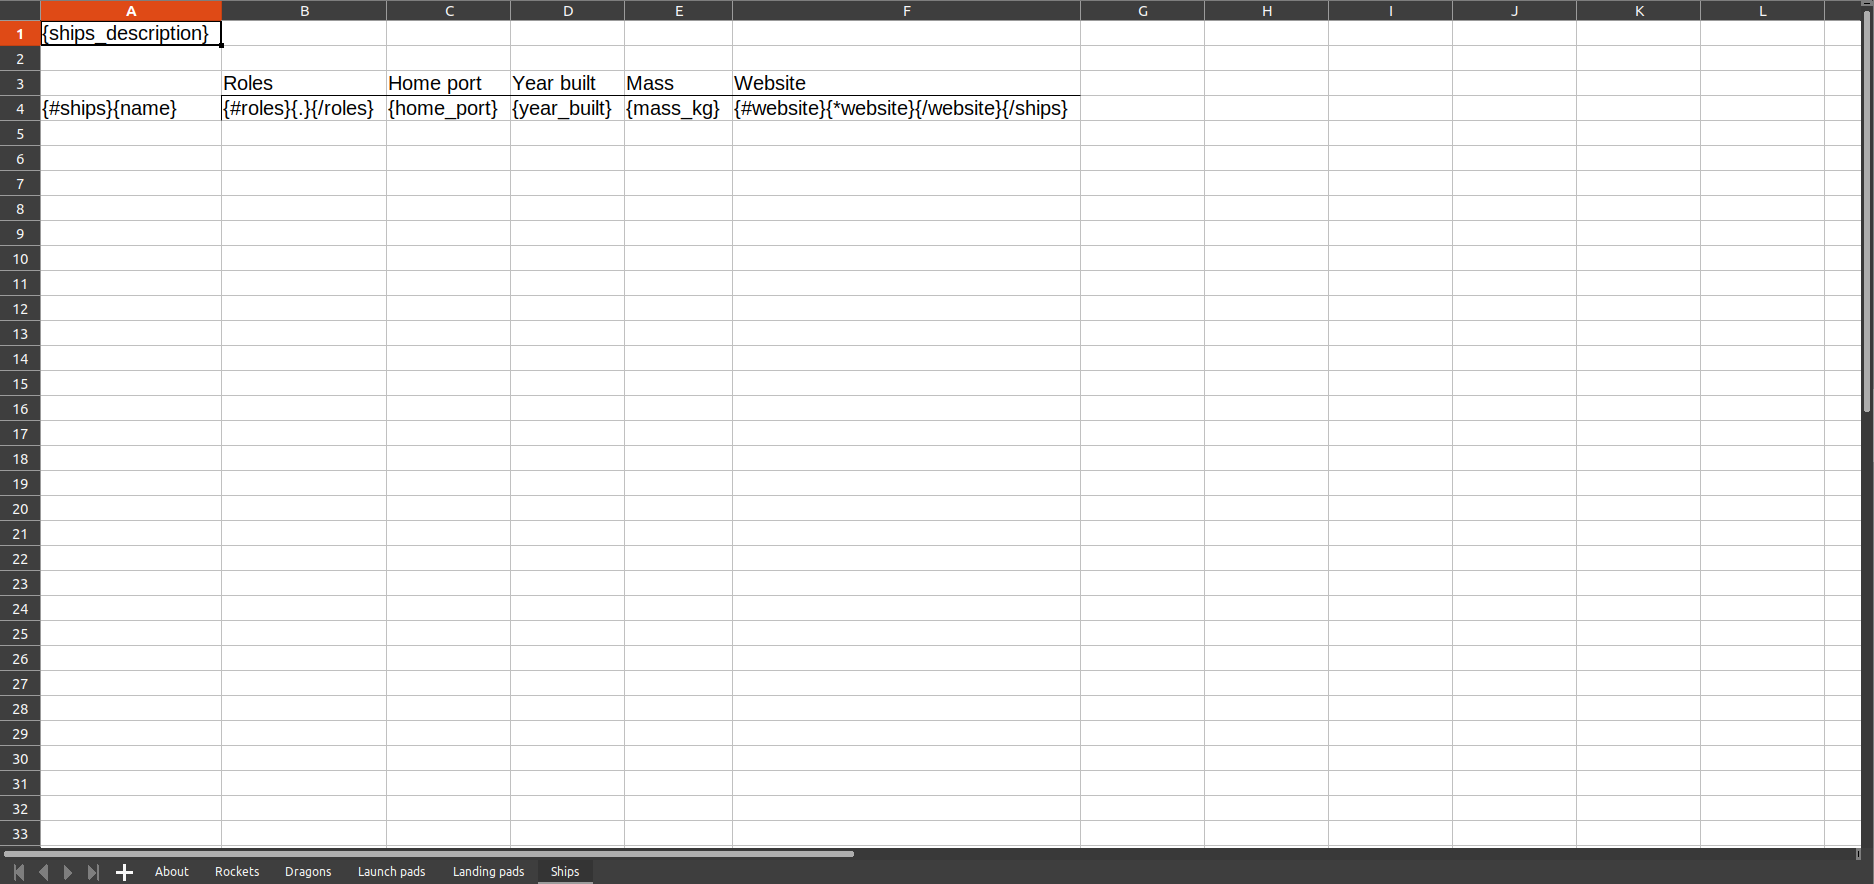
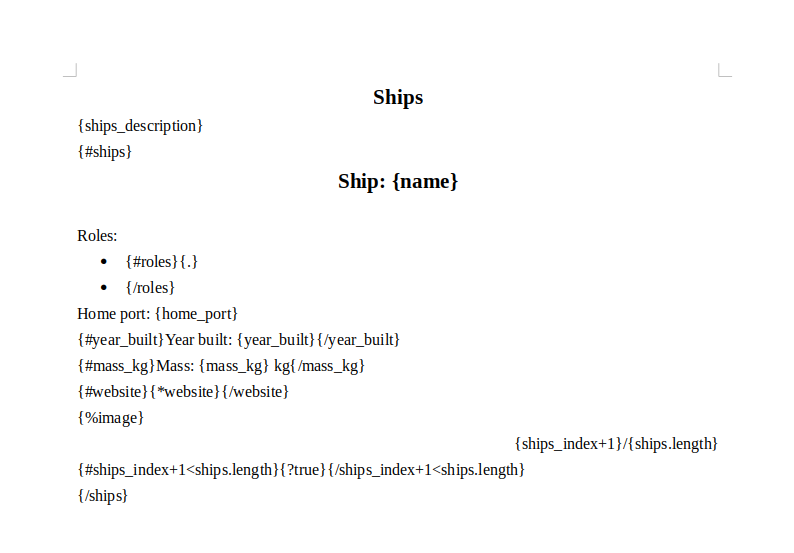
On the last slide we have to make some notes. A ship can have multiple roles, so we loop through these roles by using the loop tag: {#roles}...{/roles}, with 'roles' the name of the array in the data. Since in this case 'roles' is an array containing values (see Ships), we can insert those values using {.}. If we have an array containing objects with keys and values, we could access those values by using {key} instead of {.} between the opening and closing loop tags.
We also use a few condition-tags. These tags are used to only show what is between the opening and closing condition-tag if the condition is true. The tags used are the opening tag {#condition} and the closing tag {/condition}. The condition tags on this slide are: {#year_built}...{/year_built}, {#mass_kg}...{/mass_kg} and {#website}...{/website}.
xlsx
The xlsx-template is very similar to the pptx-template in the sense that they both use the same tags/placeholders. The only differences are:
- we do not want the images in the xlsx-file, because the images do not fit nicely into our tables, because they are too big.
- we do not generate a separate tab for each rocket, dragon, etc. Instead we loop over the objects in an Excel table
About
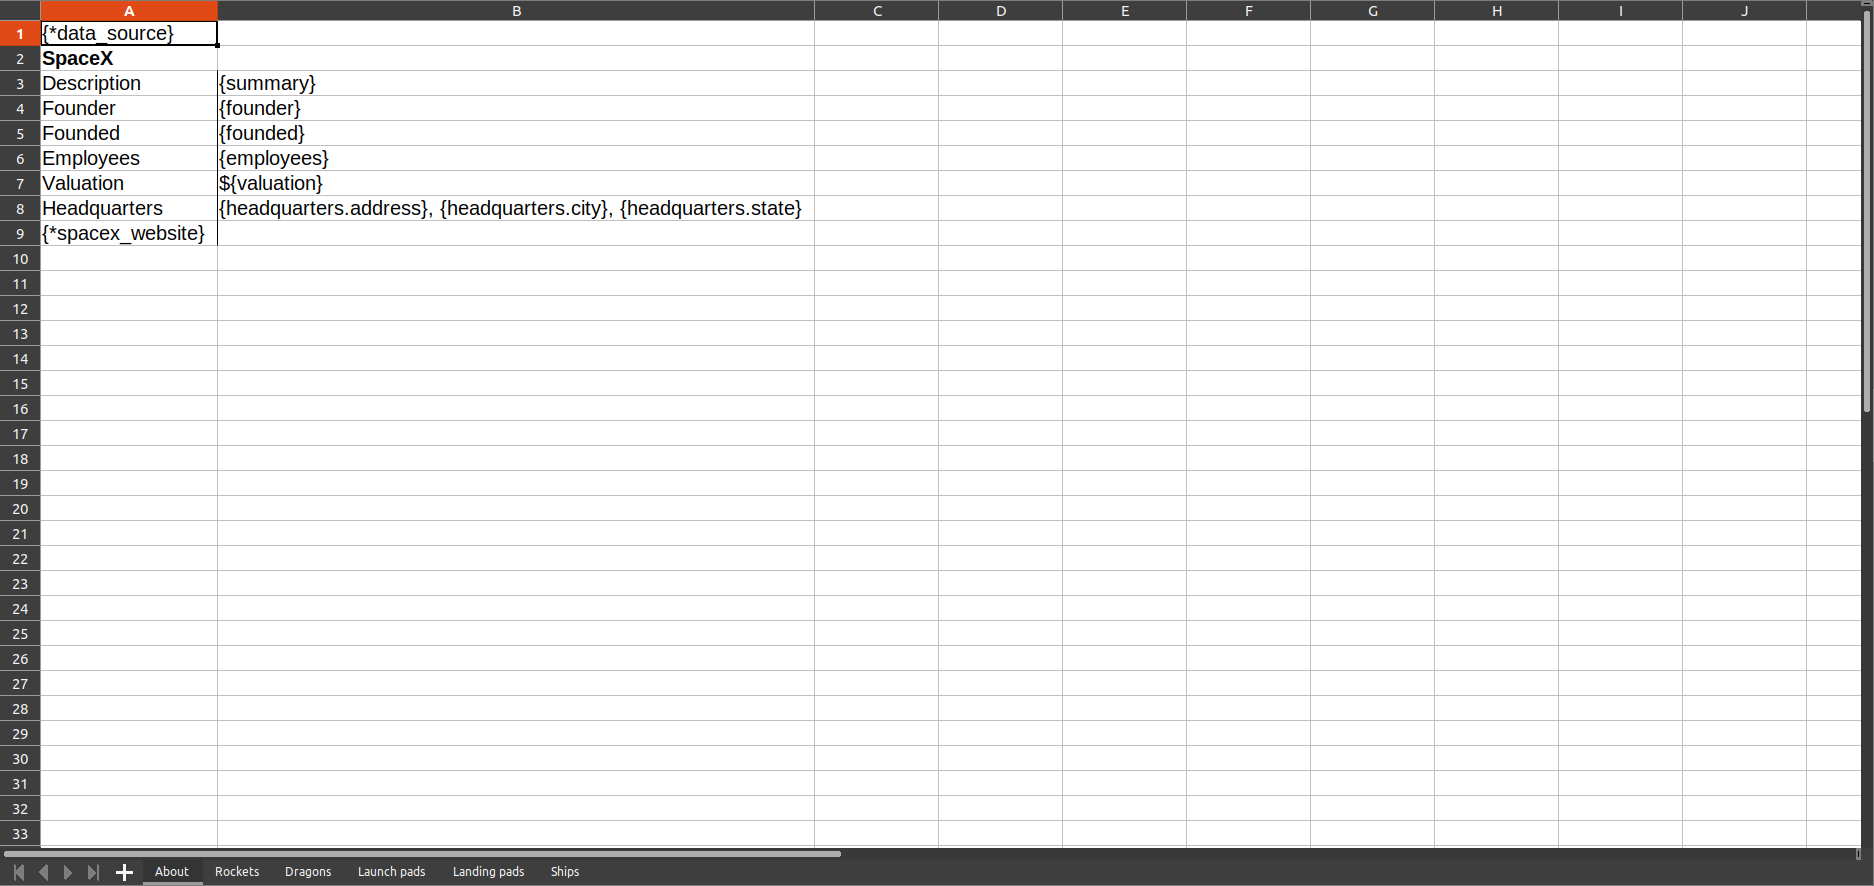
The first tab is the 'about'-tab. This tab contains the information of the company SpaceX in general and the source where we got the SpaceX data from:
Rockets
The 'rockets'-tab contains the rockets description in the left top. It also contains the data for each rocket in a table. On the image below, you can see how a table with information about each rocket can be generated:
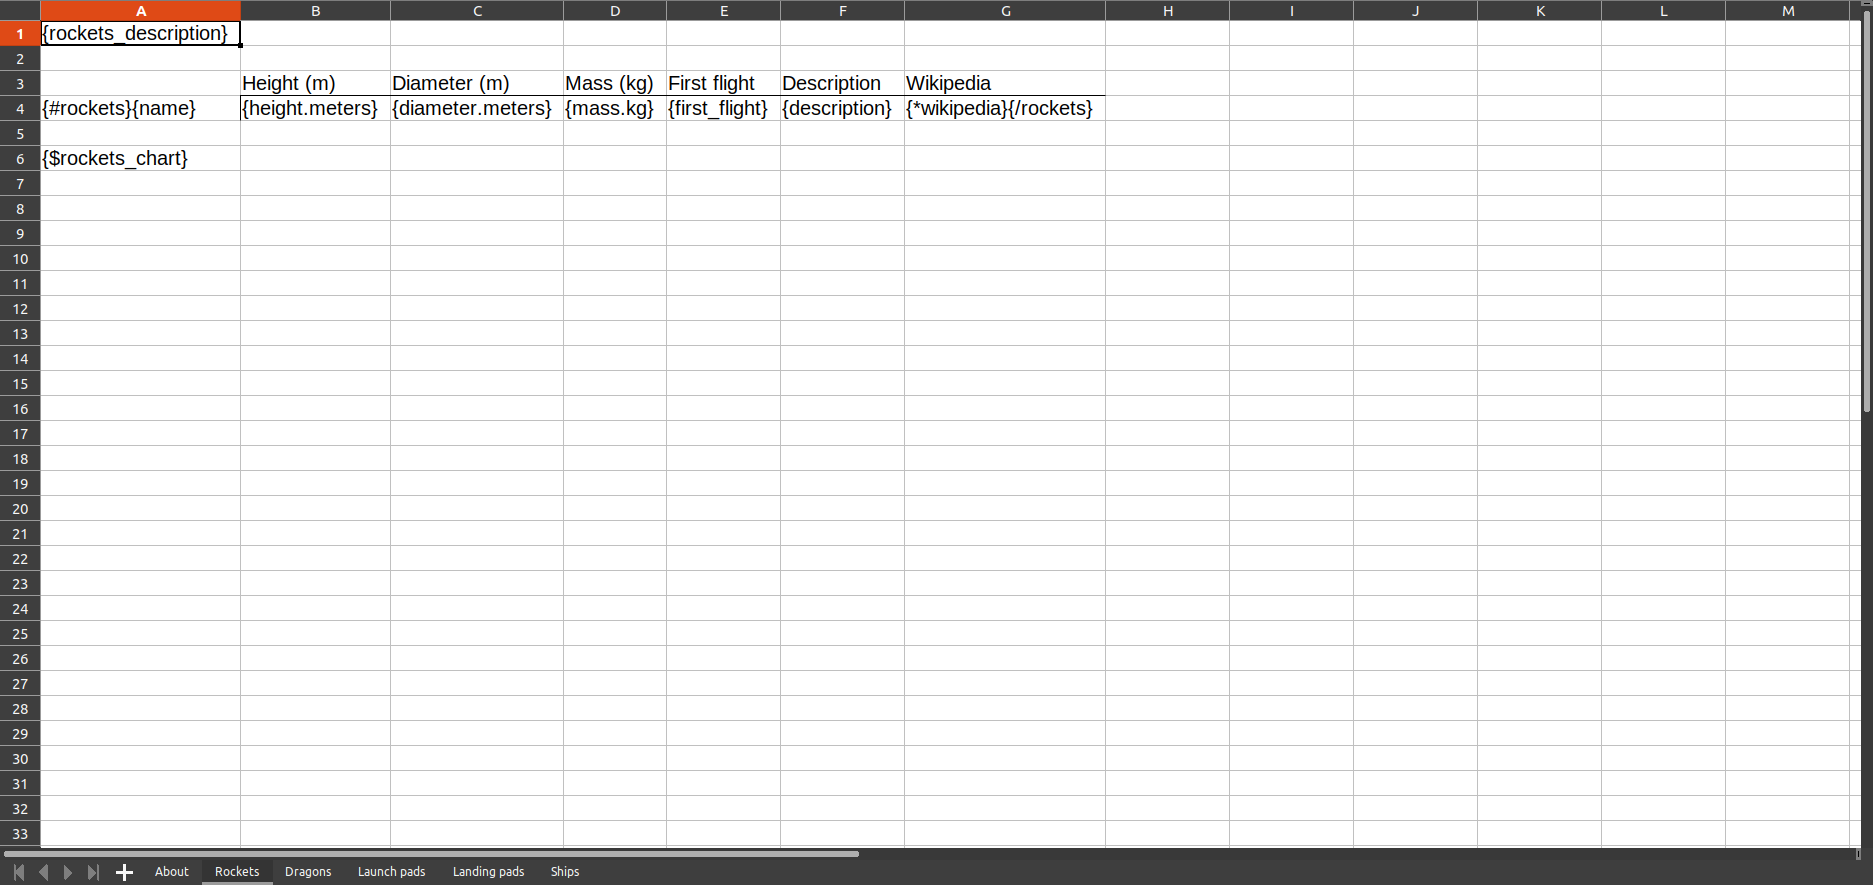
We use the loop tags {#rockets}...{/rockets} to loop through the 'rockets'-array. The Cloud Office Print server will repeat everything inside the loop tags on a new row for each object in the array.
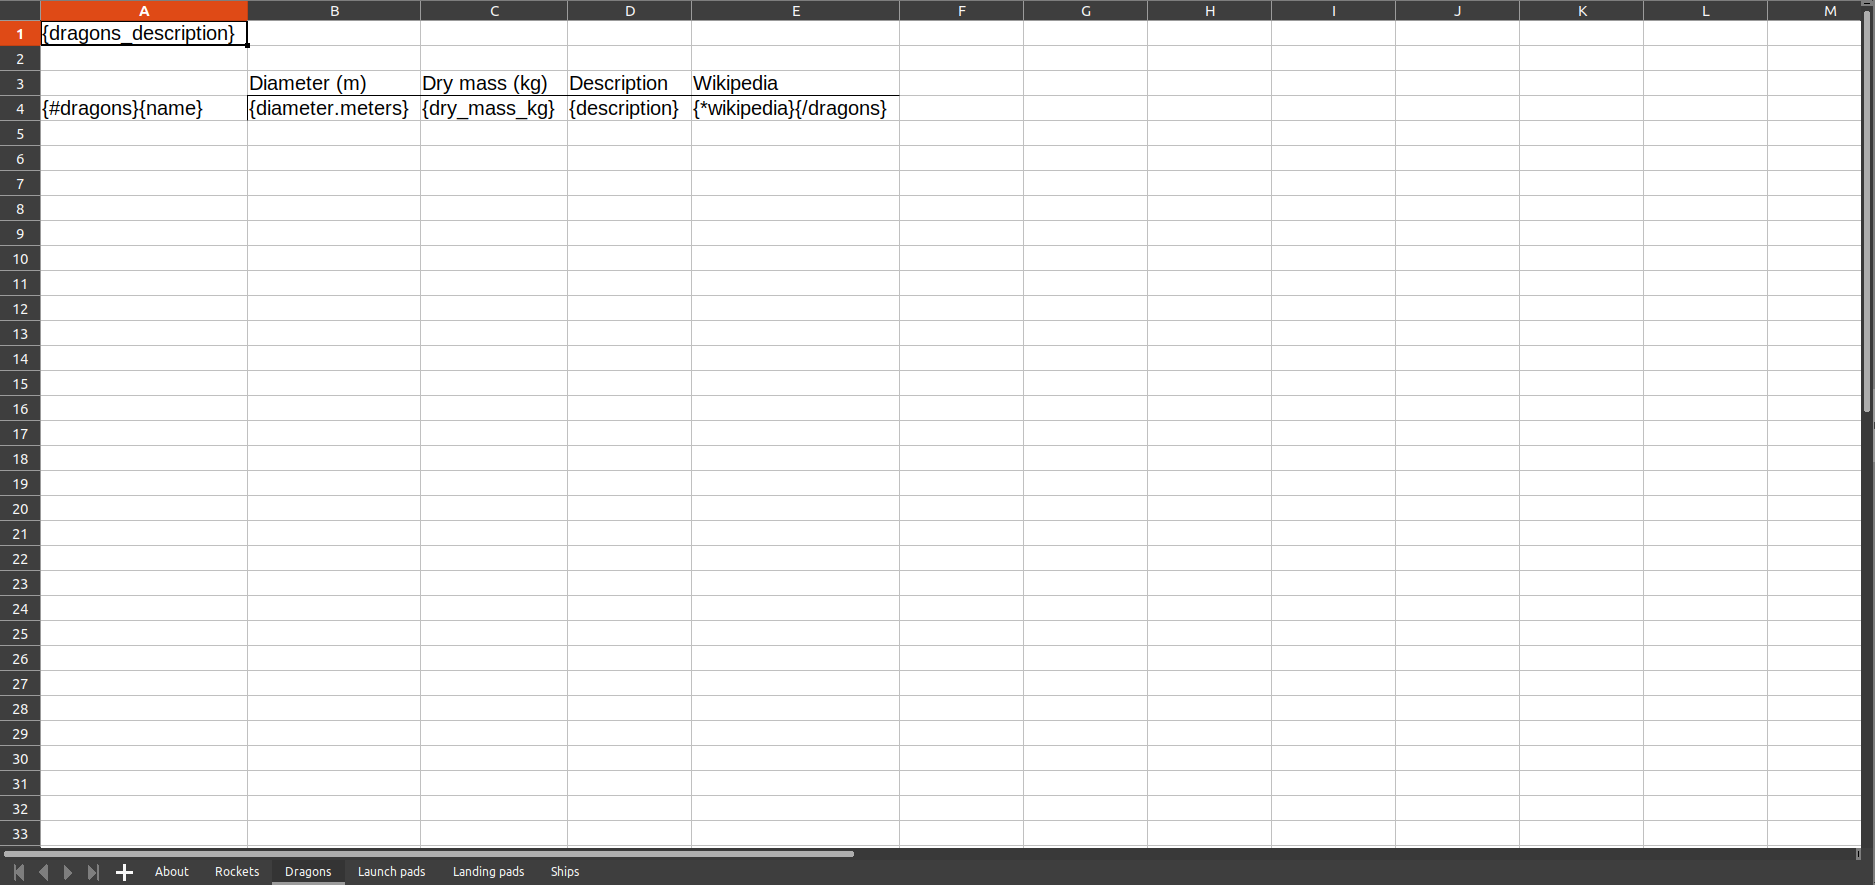
Dragons
Launch Pads
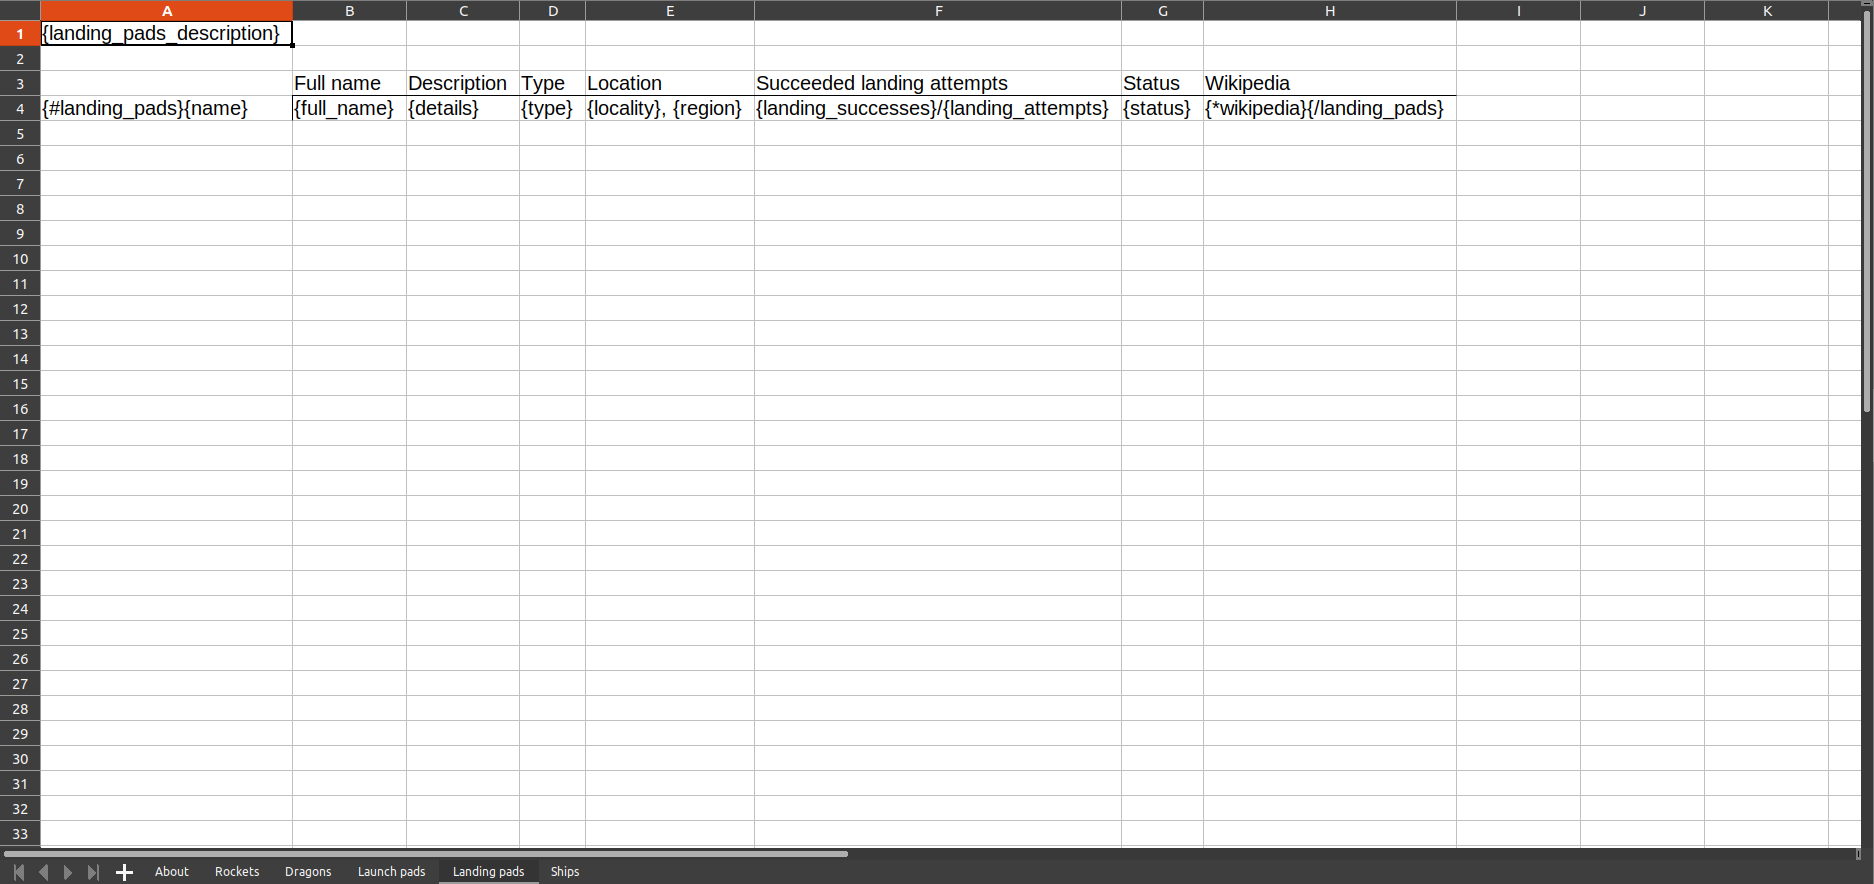
Landing Pads
Ships
Here we can again see the use of the 'condition'-tag {#website}...{/website}, because we do not want to see the text 'Website' without a hyperlink if the website is not available in the data.
docx
Again, the docx-template is very similar to the pptx-template, so we will only explain new elements in this section.
About
Rockets
We loop through all the rockets by using the loop-tag {#rockets}...{/rockets}:
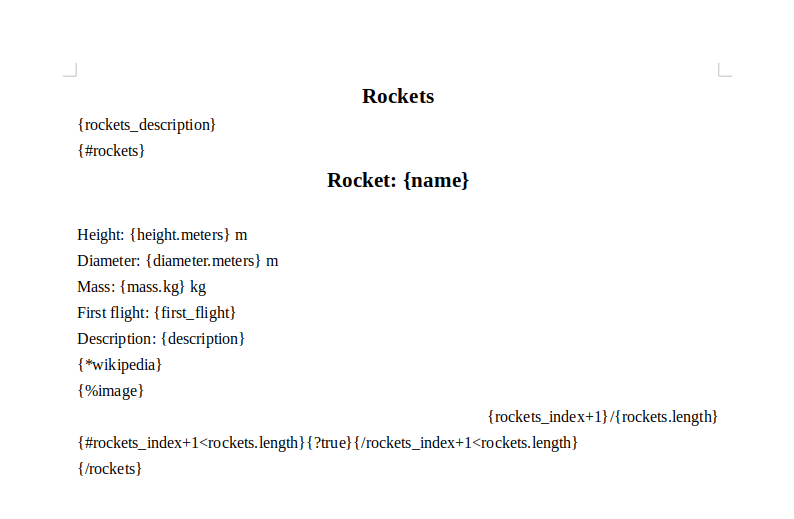
There are some new elements which we have not yet seen in the previous templates. 'rockets' is an array and we can get the current index in the loop by adding '_index' after the name of the array 'rockets'. The total length of the array can be received by adding '.length' after the array name 'rockets'. We use this to display the current page number compared to the total amount of pages of rockets.
We also want to have the information for each rocket to be an a separate page. That's why we use a pagebreak-tag {?pageBreak}. The value of pageBreak can be determined in the data by the SDK, but since we always want this to be true in this case, we use {?true}. The only time when we don't want to use the pagebreak is when we're at the last element of the 'rockets'-array, otherwise we'll end up with a blank page after the last rocket. We can achieve this by using a 'condition'-tag. We compare the current loop index rockets_index with the loop length rockets.length to know if we are at the last rocket.
We also want to show a chart of the cost per launch for each rocket:
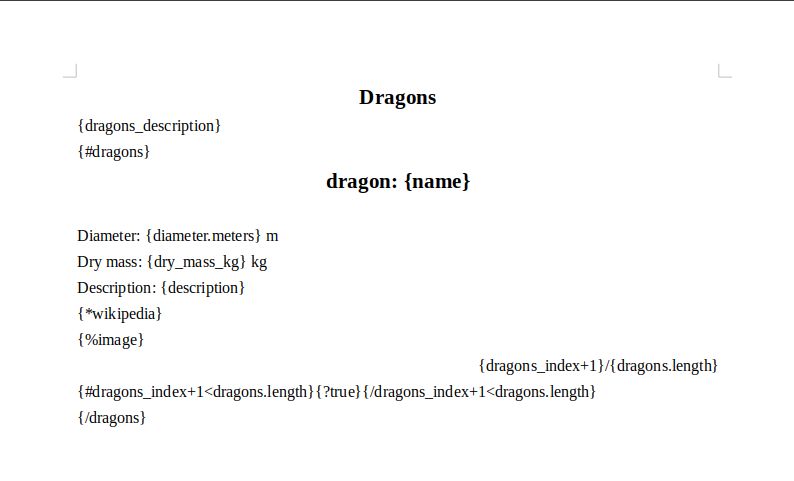
Dragons
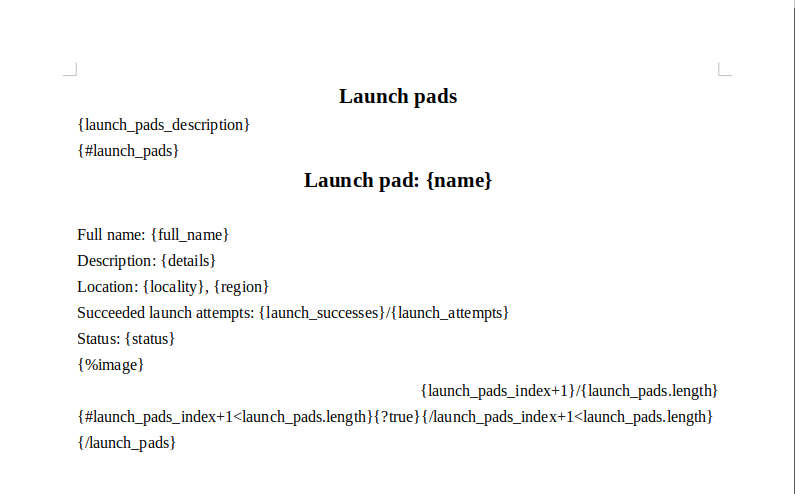
Launch Pads
Landing Pads
Ships
Process Data (SDK)
Now that our template is finished, we have to process the data used by the template. That is where the various SDKs comes into play. In this section we will explain in detail all the code needed to generate the data to fill in the template. The full Python/JavaScript/TypeScript/Java code can also be found in the files spacex_example.py, spacex_example.js, spacex_example.ts, SpaceXExample.java.
The beauty of Cloud Office Print is that the data created by an SDK can be used in all templates of different file extensions while using the same tags.
Setup
First we create a new file and import the Cloud Office Print library:
import cloudofficeprint as cop
const cop = require('cloudofficeprint');
import * as cop from 'cloudofficeprint';
// Make sure the JavaSDK is imported in your Java Project and IDE.
import com.CloudOfficePrint.*;
We also need to import the appropriate library for fetching data from the API:
import requests
const fetch = require('node-fetch');
import fetch from 'node-fetch';
// Part of com.CloudOfficePrint.Server.Server
Then we need to set up the Cloud Office Print server where we will send our template and data to:
SERVER_URL = "https://api.cloudofficeprint.com/"
API_KEY = "YOUR_API_KEY"  # Replace by your own API key

server = cop.config.Server(
    SERVER_URL,
    cop.config.ServerConfig(api_key=API_KEY),
)
const SERVER_URL = 'https://api.cloudofficeprint.com/';
const API_KEY = 'YOUR_API_KEY'; // Replace by your own API key

const server = new cop.config.Server(
    SERVER_URL,
    new cop.config.ServerConfig(API_KEY),
);
const SERVER_URL = 'https://api.cloudofficeprint.com/';
const API_KEY = 'YOUR_API_KEY'; // Replace by your own API key

const server = new cop.config.Server(
    SERVER_URL,
    new cop.config.ServerConfig(API_KEY),
);
Server copServer = new Server("https://api.cloudofficeprint.com/");
copServer.setVerbose(true); //This sets the verbose mode on.
copServer.setAPIKey(APIKey);
If you have a Cloud Office Print server running on localhost (e.g. on-premise version), replace the server url by the localhost url: http://localhost:8010.
We also need to create the main element-collection object that contains all our data:
data = cop.elements.ElementCollection()
const data = new cop.elements.ElementCollection();
const data = new cop.elements.ElementCollection();
ElementCollection spaceXData = new ElementCollection("data");
Lastly we write a function that return the first sentence of a text input. This is used when we only want to display the first sentence of a description:
def shorten_description(input: str) -> str:
    """Return only the first sentence of an input.

    Args:
        input (str): The input that needs to be shortened

    Returns:
        str: First sentence of input string
    """
    return input.split(".")[0] + "."
/**
 * Return only the first sentence of an input.
 * @param {string} input The input that needs to be shortened
 * @returns {string} first sentence of input string
 */
function shortenDescription(input) {
    return `${input.split('.')[0]}.`;
}
/**
 * Return only the first sentence of an input.
 * @param input The input that needs to be shortened
 * @returns first sentence of input string
 */
function shortenDescription(input: string): string {
    return `${input.split('.')[0]}.`;
}
/**
 * @param description Text to shorten.
 * @return Only the first phrase of the description.
 */
public String shortenDescription(String description){
    return description.split("[.]")[0] + ".";
}
Import Data
As discussed in Input data (API), we use an API of a cloud server to receive the data about SpaceX. The information we use for this example can be received as follows using the appropriate library:
info = requests.get("https://api.spacexdata.com/v3/info").json()  # v4 not supported
rockets = requests.get("https://api.spacexdata.com/v4/rockets").json()
dragons = requests.get("https://api.spacexdata.com/v4/dragons").json()
launch_pads = requests.get("https://api.spacexdata.com/v4/launchpads").json()
landing_pads = requests.get("https://api.spacexdata.com/v4/landpads").json()
ships = requests.get("https://api.spacexdata.com/v4/ships").json()
(async () => {
    const responses = await Promise.all([
        fetch('https://api.spacexdata.com/v3/info'), // v4 not supported
        fetch('https://api.spacexdata.com/v4/rockets'),
        fetch('https://api.spacexdata.com/v4/dragons'),
        fetch('https://api.spacexdata.com/v4/launchpads'),
        fetch('https://api.spacexdata.com/v4/landpads'),
        fetch('https://api.spacexdata.com/v4/ships'),
    ]);
    const [info, rockets, dragons, launchPads, landingPads, ships] =
        await Promise.all(responses.map((res) => res.json()));
})();
//Get SpaceX data from https://docs.spacexdata.com
Server server = new Server("https://api.spacexdata.com/v3/info");
String response = server.sendGETRequest(server.getUrl());
JsonObject info = JsonParser.parseString(response).getAsJsonObject();

server = new Server("https://api.spacexdata.com/v4/rockets");
response = server.sendGETRequest(server.getUrl());
JsonArray rockets = JsonParser.parseString(response).getAsJsonArray();

server = new Server("https://api.spacexdata.com/v4/dragons");
response = server.sendGETRequest(server.getUrl());
JsonArray dragons = JsonParser.parseString(response).getAsJsonArray();

server = new Server("https://api.spacexdata.com/v4/launchpads");
response = server.sendGETRequest(server.getUrl());
JsonArray launchPads = JsonParser.parseString(response).getAsJsonArray();

server = new Server("https://api.spacexdata.com/v4/landpads");
response = server.sendGETRequest(server.getUrl());
JsonArray landingPads = JsonParser.parseString(response).getAsJsonArray();

server = new Server("https://api.spacexdata.com/v4/ships");
response = server.sendGETRequest(server.getUrl());
JsonArray ships = JsonParser.parseString(response).getAsJsonArray();
Title Slide
The template title slide contains the title of our presentation and a hyperlink-tag {*data_source}. Now we need to add the data for this tag in our code by creating an Cloud Office Print element (hyperlink) and adding this to the main data collection.
data_source = cop.elements.Hyperlink(
    name="data_source",
    url="https://docs.spacexdata.com",
    text="Data source",
)
data.add(data_source)
const dataSource = new cop.elements.Hyperlink(
    'data_source',
    'https://docs.spacexdata.com',
    'Data source',
);
data.add(dataSource);
const dataSource = new cop.elements.Hyperlink(
    'data_source',
    'https://docs.spacexdata.com',
    'Data source',
);
data.add(dataSource);
spaceXData.addElement(new HyperLink("data_source", "Data source","https://docs.spacexdata.com"));
The tag {*data_source} will be replaced by the text 'Data source' and this text will have a hyperlink to the URL 'https://docs.spacexdata.com'.
Company
We see why we said in Template to use as the variable names inside the tags, the name of the keys available in the responses of Input data (API). Now we can just add the data received from the SpaceX-API to our data collection and this data can be accessed by the template:
data.add_all(cop.elements.ElementCollection.from_mapping(info))
data.addAll(cop.elements.ElementCollection.fromMapping(info));
data.addAll(cop.elements.ElementCollection.fromMapping(info));
spaceXData.addAllRenderElements(spaceXData.makeCollectionFromJson("info",info));
The only thing we need to create ourselves is the SpaceX-website hyperlink:
website = cop.elements.Hyperlink(
    name="spacex_website",
    url=info["links"]["website"],
    text="Website",
)
data.add(website)
const website = new cop.elements.Hyperlink(
    'spacex_website',
    info.links.website,
    'Website',
);
data.add(website);
const website = new cop.elements.Hyperlink(
    'spacex_website',
    info.links.website,
    'Website',
);
data.add(website);
spaceXData.addElement(new HyperLink("spacex_website", "Website", info.get("links").getAsJsonObject().get("website").getAsString()));
Rockets
We now add all the information about SpaceX's rockets to our main element collection.
Description
First we add the description for the tag {rockets_description}:
rockets_description = cop.elements.Property(
    "rockets_description",
    "Data about the rockets built by SpaceX",
)
data.add(rockets_description)
const rocketsDescription = new cop.elements.Property(
    'rockets_description',
    'Data about the rockets built by SpaceX',
);
data.add(rocketsDescription);
const rocketsDescription = new cop.elements.Property(
    'rockets_description',
    'Data about the rockets built by SpaceX',
);
data.add(rocketsDescription);
spaceXData.addElement(new Property("rockets_description", "Data about the rockets built by SpaceX"));
Main Loop
Since we want a separate slide for each rocket, we need to add the rockets information in an array to be able to loop through the rockets. We cannot just add the rocket data to our element collection, because we need to do some processing on it. We want the images to be accessible with the tag {%image} and we want to choose the size of these images. We also want to add a hyperlink for their Wikipedia page and we want to shorten their description to one sentence. The code for this is the following:
rocket_list = []

for rocket in rockets:
    collec = cop.elements.ElementCollection.from_mapping(rocket)

    img = cop.elements.Image.from_url("image", rocket["flickr_images"][0])
    img.max_height = IMAGE_MAX_HEIGHT
    img.max_width = IMAGE_MAX_WIDTH
    collec.add(img)

    hyper = cop.elements.Hyperlink(
        name="wikipedia",
        url=rocket["wikipedia"],
        text="Wikipedia",
    )
    collec.add(hyper)

    short_description = cop.elements.Property(
        "description",
        shorten_description(rocket["description"]),
    )
    collec.add(short_description)  # Overwrites the current description

    rocket_list.append(collec)
const rocketList = rockets.map((rocket) => {
    const collec = cop.elements.ElementCollection.fromMapping(rocket);

    const img = cop.elements.Image.fromUrl(
        'image',
        rocket.flickr_images[0],
        IMAGE_MAX_WIDTH,
        IMAGE_MAX_HEIGHT,
    );
    collec.add(img);

    const hyper = new cop.elements.Hyperlink(
        'wikipedia',
        rocket.wikipedia,
        'Wikipedia',
    );
    collec.add(hyper);

    const shortDescription = new cop.elements.Property(
        'description',
        shortenDescription(rocket.description),
    );
    collec.add(shortDescription); // Overwrites the current description

    return collec;
});
const rocketList: cop.elements.Element[] = rockets.map((rocket: any) => {
    const collec = cop.elements.ElementCollection.fromMapping(rocket);

    const img = cop.elements.Image.fromUrl(
        'image',
        (rocket.flickr_images as string[])[0],
        IMAGE_MAX_WIDTH,
        IMAGE_MAX_HEIGHT,
    );
    collec.add(img);

    const hyper = new cop.elements.Hyperlink(
        'wikipedia',
        rocket.wikipedia as string,
        'Wikipedia',
    );
    collec.add(hyper);

    const shortDescription = new cop.elements.Property(
        'description',
        shortenDescription(rocket.description as string),
    );
    collec.add(shortDescription); // Overwrites the current description

    return collec;
});
Loop rocketLoop = new Loop("rockets");

for (JsonElement json : rockets){
    JsonObject rocket = (JsonObject) json;
    ImageUrl img = new ImageUrl("image",rocket.get("flickr_images").getAsJsonArray().get(0).getAsString());
    img.setMaxHeight(250);
    img.setMaxWidth(400);
    rocket.remove("flickr_images");//we don't need this anymore
    ElementCollection coll = spaceXData.makeCollectionFromJson("rocket",rocket);
    coll.addElement(img);
    coll.addElement(new Property("description",shortenDescription(rocket.get("description").getAsString()))); //should overwrite the older one
    coll.addElement(new HyperLink("wikipedia","Wikipedia",rocket.get("wikipedia").getAsString()));
    rocketLoop.addElement(coll);
}
We loop through all the rockets and for each rocket, we first create an element collection with the data received from the API. Then we create the image element and specify its height and width and add this image to the collection. Next we create the hyperlink and also add this to the collection. Finally we shorten the description, add this to the collection and add the rocket element collection to the rocket list created earlier.
Now we need to make an element of the rocket list. Because we use {!rockets} in our template to loop over all the rockets, the name of this loop-element needs to be 'rockets'. Finally we add this loop-element to the main data collection:
rocket_data = cop.elements.ForEach("rockets", rocket_list)
data.add(rocket_data)
const rocketData = new cop.elements.ForEach('rockets', rocketList);
data.add(rocketData);
const rocketData = new cop.elements.ForEach('rockets', rocketList);
data.add(rocketData);
spaceXData.addElement(rocketLoop);
Chart
We also want to implement a chart in our example. The tag in the template is {$rockets_chart}. We want to plot the cost per launch for each rocket. That means that on the x-axis we want to see the rocket names and on the y-axis their costs per launch. We thus create two lists like this:
x = [rocket["name"] for rocket in rockets]
cost_y = [rocket["cost_per_launch"] for rocket in rockets]
const x = rockets.forEach((rocket) => rocket.name);
const costY = rockets.forEach((rocket) => rocket.cost_per_launch);
const x: string[] = rockets.map((rocket: any) => rocket.name as string);
const costY: number[] = rockets.map(
    (rocket: any) => rocket.cost_per_launch as number,
);
ArrayList<String> x = new ArrayList<String>();
ArrayList<String> costY = new ArrayList<String>();
for (int i =0; i< rockets.size();i++){
    JsonObject rocket = (JsonObject) rockets.get(i);
    x.add(rocket.get("name").getAsString());
    costY.add(rocket.get("cost_per_launch").getAsString());
}
Each chart can contain multiple data series. Since we only want to show the cost per launch for the rockets, we only need one series. Let's say we want our chart to show the data in vertical bars, then we can use this code:
cost_series = cop.elements.ColumnSeries(
    x=x,
    y=cost_y,
    name="Cost per launch",
    color="#087c6c",
)
const costSeries = new cop.elements.ColumnSeries(
    x,
    costY,
    'Cost per launch',
    '#087c6c',
);
const costSeries = new cop.elements.ColumnSeries(
    x,
    costY,
    'Cost per launch',
    '#087c6c',
);
ColumnSeries cost_series = new ColumnSeries("Cost per launch",x.toArray(new String[0]),costY.toArray(new String[0]));
cost_series.setColor("#087c6c");
We also specify the name of the series (showed in the legend) and the color of the bars.
Next we want to choose the style of our chart, so we create an element for chart options:
rockets_chart_options = cop.elements.ChartOptions(
    x_axis=cop.elements.ChartAxisOptions(
        title="Rocket", title_style=cop.elements.ChartTextStyle(color="black")
    ),
    y_axis=cop.elements.ChartAxisOptions(
        title="Cost ($)",
        title_rotation=-90,
        title_style=cop.elements.ChartTextStyle(color="black"),
        major_grid_lines=True,
    ),
    width=CHART_WIDTH,
    height=300,
    rounded_corners=True,
    border=False,
    background_color="#c8a45c",
    background_opacity=50,
)
const rocketsChartOptions = new cop.elements.ChartOptions(
    new cop.elements.ChartAxisOptions(
        undefined,
        undefined,
        undefined,
        undefined,
        'Rocket',
        undefined,
        undefined,
        new cop.elements.ChartTextStyle(undefined, undefined, 'black'),
    ),
    new cop.elements.ChartAxisOptions(
        undefined,
        undefined,
        undefined,
        undefined,
        'Cost ($)',
        undefined,
        undefined,
        new cop.elements.ChartTextStyle(undefined, undefined, 'black'),
        -90,
        true,
    ),
    undefined,
    CHART_WIDTH,
    300,
    false,
    true,
    '#c8a45c',
    50,
);
ChartOptions rocketChartOptions = new ChartOptions();
ChartAxisOptions xAxisOptions= new ChartAxisOptions();
xAxisOptions.setTitle("Rocket");
xAxisOptions.setTitleStyle(new ChartTextStyle(null,null,"black",null));
rocketChartOptions.setXAxisOptions(xAxisOptions);

ChartAxisOptions yAxisOptions= new ChartAxisOptions();
yAxisOptions.setTitle("Cost ($)");
yAxisOptions.setTitleStyle(new ChartTextStyle(null,null,"black",null));
yAxisOptions.setTitleRotation(-90);
yAxisOptions.setMajorGridLines(true);
rocketChartOptions.setYAxisOptions(yAxisOptions);

rocketChartOptions.setWidth(800);
rocketChartOptions.setHeight(300);
rocketChartOptions.setRoundedCorners(true);
rocketChartOptions.setBorder(false);
rocketChartOptions.setBackgroundColor("#c8a45c");
rocketChartOptions.setBackgroundOpacity(50);
We also create styling elements for the axes, which include the title of the axis and its styling, the title rotation and if the grid lines need to be shown. The other options speak for themselves.
Next we would like to have a legend showing on the right side of the chart:
rockets_chart_options.set_legend(style=cop.elements.ChartTextStyle(color="black"))
rocketsChartOptions.setLegend(
    undefined,
    new cop.elements.ChartTextStyle(undefined, undefined, 'black'),
);
rocketsChartOptions.setLegend(
    undefined,
    new cop.elements.ChartTextStyle(undefined, undefined, 'black'),
);
rocketChartOptions.setLegend(null,new ChartTextStyle(null,null,"black",null));
The color of the text in the legend is chosen to be black and its position is on the right side of the chart by default.
Now we create the actual chart with the series created earlier and the chart options and add this to the main element collection (data). Because the tag used in our template is {$rockets_chart}, the name of the chart element should be 'rockets_chart':
rockets_chart = cop.elements.ColumnChart(
    name="rockets_chart",
    columns=(cost_series,),
    options=rockets_chart_options,
)
data.add(rockets_chart)
const rocketsChart = new cop.elements.ColumnChart(
    'rockets_chart',
    [costSeries],
    rocketsChartOptions,
);
data.add(rocketsChart);
const rocketsChart = new cop.elements.ColumnChart(
    'rockets_chart',
    [costSeries],
    rocketsChartOptions,
);
data.add(rocketsChart);
ColumnChart rocketChart = new ColumnChart("rockets_chart",rocketChartOptions,cost_series);
spaceXData.addElement(rocketChart);

// This function can take multiple series as last arguments, but here we have only one.
Dragons
The dragons data can be added in the same way as the rockets.
Description
dragon_description = cop.elements.Property(
    "dragons_description",
    "Data about the dragon capsules of SpaceX",
)
data.add(dragon_description)
const dragonDescription = new cop.elements.Property(
    'dragons_description',
    'Data about the dragon capsules of SpaceX',
);
data.add(dragonDescription);
const dragonDescription = new cop.elements.Property(
    'dragons_description',
    'Data about the dragon capsules of SpaceX',
);
data.add(dragonDescription);
spaceXData.addElement(new Property("dragons_description", "Data about the dragon capsules of SpaceX"));
Main Loop
dragon_list = []

for dragon in dragons:
    collec = cop.elements.ElementCollection.from_mapping(dragon)

    img = cop.elements.Image.from_url("image", dragon["flickr_images"][0])
    img.max_height = IMAGE_MAX_HEIGHT
    img.max_width = IMAGE_MAX_WIDTH
    collec.add(img)

    hyper = cop.elements.Hyperlink(
        name="wikipedia",
        url=dragon["wikipedia"],
        text="Wikipedia",
    )
    collec.add(hyper)

    short_description = cop.elements.Property(
        "description",
        shorten_description(dragon["description"]),
    )
    collec.add(short_description)  # Overwrites the current description

    dragon_list.append(collec)

dragon_data = cop.elements.ForEach("dragons", dragon_list)
data.add(dragon_data)
const dragonList = dragons.map((dragon) => {
    const collec = cop.elements.ElementCollection.fromMapping(dragon);

    const img = cop.elements.Image.fromUrl(
        'image',
        dragon.flickr_images[0],
        IMAGE_MAX_WIDTH,
        IMAGE_MAX_HEIGHT,
    );
    collec.add(img);

    const hyper = new cop.elements.Hyperlink(
        'wikipedia',
        dragon.wikipedia,
        'Wikipedia',
    );
    collec.add(hyper);

    const shortDescription = new cop.elements.Property(
        'description',
        shortenDescription(dragon.description),
    );
    collec.add(shortDescription); // Overwrites the current description

    return collec;
});

const dragonData = new cop.elements.ForEach('dragons', dragonList);
data.add(dragonData);
const dragonList: cop.elements.Element[] = dragons.map((dragon: any) => {
    const collec = cop.elements.ElementCollection.fromMapping(dragon);

    const img = cop.elements.Image.fromUrl(
        'image',
        (dragon.flickr_images as string[])[0],
        IMAGE_MAX_WIDTH,
        IMAGE_MAX_HEIGHT,
    );
    collec.add(img);

    const hyper = new cop.elements.Hyperlink(
        'wikipedia',
        dragon.wikipedia as string,
        'Wikipedia',
    );
    collec.add(hyper);

    const shortDescription = new cop.elements.Property(
        'description',
        shortenDescription(dragon.description as string),
    );
    collec.add(shortDescription); // Overwrites the current description

    return collec;
});

const dragonData = new cop.elements.ForEach('dragons', dragonList);
data.add(dragonData);
//Add dragon data
Loop dragonLoop = new Loop("dragons");
for (JsonElement json : dragons){
    JsonObject dragon = (JsonObject) json;
    ImageUrl img = new ImageUrl("image",dragon.get("flickr_images").getAsJsonArray().get(0).getAsString());
    img.setMaxHeight(250);
    img.setMaxWidth(400);
    ElementCollection coll = spaceXData.makeCollectionFromJson("dragon",dragon);
    coll.addElement(img);
    coll.addElement(new Property("description", shortenDescription(dragon.get("description").getAsString())));
    coll.addElement(new HyperLink("wikipedia","Wikipedia",dragon.get("wikipedia").getAsString()));
    dragonLoop.addElement(coll);
}
spaceXData.addElement(dragonLoop);
Launch Pads
Description
launch_pad_description = cop.elements.Property(
    "launch_pads_description",
    "Data about SpaceX's launch pads",
)
data.add(launch_pad_description)
const launchPadDescription = new cop.elements.Property(
    'launch_pads_description',
    "Data about SpaceX's launch pads",
);
data.add(launchPadDescription);
const launchPadDescription = new cop.elements.Property(
    'launch_pads_description',
    "Data about SpaceX's launch pads",
);
data.add(launchPadDescription);
spaceXData.addElement(new Property("launch_pads_description", "Data about SpaceX's launch pads"));
Main Loop
launch_pad_list = []

for launch_pad in launch_pads:
    collec = cop.elements.ElementCollection.from_mapping(launch_pad)

    img = cop.elements.Image.from_url("image", launch_pad["images"]["large"][0])
    img.max_height = IMAGE_MAX_HEIGHT
    img.max_width = IMAGE_MAX_WIDTH
    collec.add(img)

    short_description = cop.elements.Property(
        "details",
        shorten_description(launch_pad["details"]),
    )
    collec.add(short_description)  # Overwrites the current description

    launch_pad_list.append(collec)

launch_pad_data = cop.elements.ForEach("launch_pads", launch_pad_list)
data.add(launch_pad_data)
const launchPadList = launchPads.map((launchPad) => {
    const collec = cop.elements.ElementCollection.fromMapping(launchPad);

    const img = cop.elements.Image.fromUrl(
        'image',
        launchPad.images.large[0],
        IMAGE_MAX_WIDTH,
        IMAGE_MAX_HEIGHT,
    );
    collec.add(img);

    const shortDescription = new cop.elements.Property(
        'details',
        shortenDescription(launchPad.details),
    );
    collec.add(shortDescription); // Overwrites the current description

    return collec;
});

const launchPadData = new cop.elements.ForEach('launch_pads', launchPadList);
data.add(launchPadData);
const launchPadList: cop.elements.Element[] = launchPads.map(
    (launchPad: any) => {
        const collec = cop.elements.ElementCollection.fromMapping(launchPad);

        const img = cop.elements.Image.fromUrl(
            'image',
            (launchPad.images as { [key: string]: string[] }).large[0],
            IMAGE_MAX_WIDTH,
            IMAGE_MAX_HEIGHT,
        );
        collec.add(img);

        const shortDescription = new cop.elements.Property(
            'details',
            shortenDescription(launchPad.details as string),
        );
        collec.add(shortDescription); // Overwrites the current description

        return collec;
    },
);

const launchPadData = new cop.elements.ForEach('launch_pads', launchPadList);
data.add(launchPadData);
Loop launchpadLoop = new Loop("launch_pads");
for (JsonElement json : launchPads){
    JsonObject launchpad = (JsonObject) json;
    ImageUrl img = new ImageUrl("image",launchpad.get("images").getAsJsonObject().get("large").getAsJsonArray().get(0).getAsString());
    img.setMaxHeight(250);
    img.setMaxWidth(400);
    ElementCollection coll = spaceXData.makeCollectionFromJson("launchpad",launchpad);
    coll.addElement(img);
    coll.addElement(new Property("details",shortenDescription(launchpad.get("details").getAsString())));
    launchpadLoop.addElement(coll);
}
spaceXData.addElement(launchpadLoop);
Here we didn't add Wikipedia hyperlinks, because they are not available in the API data.
Landing Pads
Description
landing_pad_description = cop.elements.Property(
    "landing_pads_description",
    "Data about SpaceX's landing pads",
)
data.add(landing_pad_description)
const landingPadDescription = new cop.elements.Property(
    'landing_pads_description',
    "Data about SpaceX's landing pads",
);
data.add(landingPadDescription);
const landingPadDescription = new cop.elements.Property(
    'landing_pads_description',
    "Data about SpaceX's landing pads",
);
data.add(landingPadDescription);
spaceXData.addElement( new Property("landing_pads_description","Data about SpaceX's landing pads"));
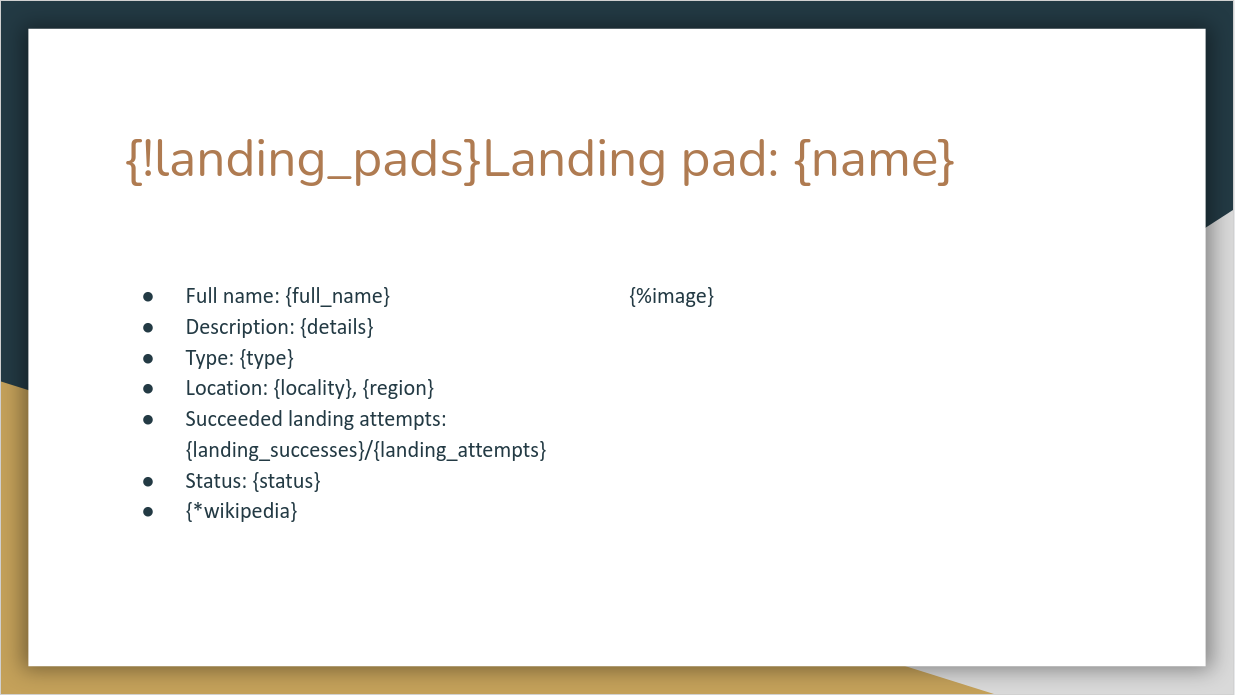
Main Loop
landing_pad_list = []

for landing_pad in landing_pads:
    collec = cop.elements.ElementCollection.from_mapping(landing_pad)

    img = cop.elements.Image.from_url("image", landing_pad["images"]["large"][0])
    img.max_height = IMAGE_MAX_HEIGHT
    img.max_width = IMAGE_MAX_WIDTH
    collec.add(img)

    hyper = cop.elements.Hyperlink(
        name="wikipedia",
        url=landing_pad["wikipedia"],
        text="Wikipedia",
    )
    collec.add(hyper)

    short_description = cop.elements.Property(
        "details",
        shorten_description(landing_pad["details"]),
    )
    collec.add(short_description)  # Overwrites the current description

    landing_pad_list.append(collec)

landing_pad_data = cop.elements.ForEach("landing_pads", landing_pad_list)
data.add(landing_pad_data)
const landingPadList = landingPads.map((landingPad) => {
    const collec = cop.elements.ElementCollection.fromMapping(landingPad);

    const img = cop.elements.Image.fromUrl(
        'image',
        landingPad.images.large[0],
        IMAGE_MAX_WIDTH,
        IMAGE_MAX_HEIGHT,
    );
    collec.add(img);

    const hyper = new cop.elements.Hyperlink(
        'wikipedia',
        landingPad.wikipedia,
        'Wikipedia',
    );
    collec.add(hyper);

    const shortDescription = new cop.elements.Property(
        'details',
        shortenDescription(landingPad.details),
    );
    collec.add(shortDescription); // Overwrites the current description

    return collec;
});

const landingPadData = new cop.elements.ForEach('landing_pads', landingPadList);
data.add(landingPadData);
const landingPadList: cop.elements.Element[] = landingPads.map(
    (landingPad: any) => {
        const collec = cop.elements.ElementCollection.fromMapping(landingPad);

        const img = cop.elements.Image.fromUrl(
            'image',
            (landingPad.images as { [key: string]: string[] }).large[0],
            IMAGE_MAX_WIDTH,
            IMAGE_MAX_HEIGHT,
        );
        collec.add(img);

        const hyper = new cop.elements.Hyperlink(
            'wikipedia',
            landingPad.wikipedia as string,
            'Wikipedia',
        );
        collec.add(hyper);

        const shortDescription = new cop.elements.Property(
            'details',
            shortenDescription(landingPad.details as string),
        );
        collec.add(shortDescription); // Overwrites the current description

        return collec;
    },
);

const landingPadData = new cop.elements.ForEach('landing_pads', landingPadList);
data.add(landingPadData);
Loop landingpadLoop = new Loop("landing_pads");
for (JsonElement json : landingPads){
    JsonObject landingpad = (JsonObject) json;
    ImageUrl img = new ImageUrl("image",landingpad.get("images").getAsJsonObject().get("large").getAsJsonArray().get(0).getAsString());
    img.setMaxHeight(250);
    img.setMaxWidth(400);
    ElementCollection coll = spaceXData.makeCollectionFromJson("landingpad",landingpad);
    coll.addElement(img);
    coll.addElement(new Property("details",shortenDescription(landingpad.get("details").getAsString())));
    coll.addElement(new HyperLink("wikipedia","Wikipedia",landingpad.get("wikipedia").getAsString()));
    landingpadLoop.addElement(coll);
}
spaceXData.addElement(landingpadLoop);
Ships
Description
ship_description = cop.elements.Property(
    "ships_description",
    "Data about the ships that assist SpaceX launches, including ASDS drone ships, tugs, fairing recovery ships, and various support ships",
)
data.add(ship_description)
const shipDescription = new cop.elements.Property(
    'ships_description',
    'Data about the ships that assist SpaceX launches, including ASDS drone ships, tugs, fairing recovery ships, and various support ships',
);
data.add(shipDescription);
const shipDescription = new cop.elements.Property(
    'ships_description',
    'Data about the ships that assist SpaceX launches, including ASDS drone ships, tugs, fairing recovery ships, and various support ships',
);
data.add(shipDescription);
spaceXData.addElement(new Property("ships_description", "Data about the ships that assist SpaceX launches, including ASDS drone ships, tugs, fairing recovery ships, and various support ships"));
Main Loop
ship_list = []

for ship in ships:
    collec = cop.elements.ElementCollection.from_mapping(ship)

    img = cop.elements.Image.from_url("image", ship["image"])
    img.max_height = IMAGE_MAX_HEIGHT
    img.max_width = IMAGE_MAX_WIDTH
    collec.add(img)

    hyper = cop.elements.Hyperlink(
        name="website",
        url=ship["link"],
        text="Website",
    )
    collec.add(hyper)

    ship_list.append(collec)

ship_data = cop.elements.ForEach("ships", ship_list)
data.add(ship_data)
const shipList = ships.map((ship) => {
    const collec = cop.elements.ElementCollection.fromMapping(ship);

    const img = cop.elements.Image.fromUrl(
        'image',
        ship.image,
        IMAGE_MAX_WIDTH,
        IMAGE_MAX_HEIGHT,
    );
    collec.add(img);

    const hyper = new cop.elements.Hyperlink('website', ship.link, 'Website');
    collec.add(hyper);

    return collec;
});

const shipData = new cop.elements.ForEach('ships', shipList);
data.add(shipData);
const shipList: cop.elements.Element[] = ships.map((ship: any) => {
    const collec = cop.elements.ElementCollection.fromMapping(ship);

    const img = cop.elements.Image.fromUrl(
        'image',
        ship.image as string,
        IMAGE_MAX_WIDTH,
        IMAGE_MAX_HEIGHT,
    );
    collec.add(img);

    const hyper = new cop.elements.Hyperlink(
        'website',
        ship.link as string,
        'Website',
    );
    collec.add(hyper);

    return collec;
});

const shipData = new cop.elements.ForEach('ships', shipList);
data.add(shipData);
Loop shipLoop = new Loop("ships");
for (JsonElement json : ships){
    JsonObject ship = (JsonObject) json;
    ImageUrl img;
    if (ship.get("image").isJsonNull()==false){
        img = new ImageUrl("image",ship.get("image").getAsString());
        img.setMaxHeight(250);
        img.setMaxWidth(400);
    }
    else {
        img = new ImageUrl("image",null);
        img.setMaxHeight(250);
        img.setMaxWidth(400);
    }
    ElementCollection coll = spaceXData.makeCollectionFromJson("ship",ship);
    coll.addElement(img);
    if (ship.get("link").isJsonNull()==false){
        coll.addElement(new HyperLink("website","Website",ship.get("link").getAsString()));
    }
    else {
        coll.addElement(new HyperLink("website","Website",null));
    }
    shipLoop.addElement(coll);
}
spaceXData.addElement(shipLoop);
Here we didn't shorten the description to one sentence, since there is no description available for the ships in the API data.
Server and Response
Now that we have the template and the data ready, it is time to let Cloud Office Print merge them together. In the Python SDK this is implemented by creating a printjob:
print_job = cop.PrintJob(
    # NOTE: change IMAGE_MAX_HEIGHT, IMAGE_MAX_WIDTH and CHART_WIDTH at the beginning of this script according to filetype
    data=data,
    server=server,
    template=cop.Template.from_local_file("spacex_template.pptx"),  # For pptx
    # template=cop.Template.from_local_file("spacex_template.xlsx"),  # For xlsx
    # template=cop.Template.from_local_file("spacex_template.docx"),  # For docx
)
const printJob = new cop.PrintJob(
    data,
    server,
    cop.Template.fromLocalFile('spacex_template.pptx'), // For pptx
    // cop.Template.fromLocalFile('spacex_template.xlsx'), // For xlsx
    // cop.Template.fromLocalFile('spacex_template.docx'), // For docx
);
const printJob = new cop.PrintJob(
    data,
    server,
    cop.Template.fromLocalFile('spacex_template.pptx'), // For pptx
    // cop.Template.fromLocalFile('spacex_template.xlsx'), // For xlsx
    // cop.Template.fromLocalFile('spacex_template.docx'), // For docx
);
// We need to make an object that contains the template. We take the template from our local files. In this example we have 3 different types for the template.

Base64Resource base64Resource = new Base64Resource();
if (template.equals("docx")){
    base64Resource.setFileFromLocalFile("./src/com/company/Examples/SpaceX/spacex_template.docx");
}
else if (template.equals("pptx")){
    base64Resource.setFileFromLocalFile("./src/com/company/Examples/SpaceX/spacex_template.pptx");
}
else if (template.equals("xlsx")){
    base64Resource.setFileFromLocalFile("./src/com/company/Examples/SpaceX/spacex_template.xlsx");
}

// The printjob expects a Hashtable for the data elements. Each entry in the hashtable generates another output. If the table has more then one entry the output will be a zip file containing the different output with their name equal to their entry key. The printjob expects an Output object that contains the output configuration as well.

Hashtable<String, RenderElement> data = new Hashtable<String, RenderElement>();
data.put("spaceXData",spaceXData);
Output output = new Output(null,"raw","libreoffice",null,null,null);
PrintJob printJob = new PrintJob(data,copServer,output,base64Resource,null,null,null,null);
We loaded the template from a local file, passed in our data element collection and our server object.
Finally we actually send this printjob to an Cloud Office Print server and save the response into our output file:
response = print_job.execute()
response.to_file("output")
(async () => {
    const response = await printJob.execute();
    await response.toFile('output');
})();
(async () => {
    const response = await printJob.execute();
    await response.toFile('output');
})();
Response response = printJob.execute();
response.downloadLocally("./downloads/spaceX");


// If we would want to do this asynchronously, we shoud do it like this :

Thread thread = new Thread(printJob); //This is how to run send the POST request asynchronously (because it can sometimes take a few seconds before getting back the response).
thread.start();
//do some stuf in between
thread.join();
Response response = printJob.getResponse();
response.downloadLocally("./downloads/spaceX");
The resulting file can now be found in the specified folder. We will not add the result in this markdown file, but the result can be seen in the files output.pptx, output.xlsx and output.docx which can be found in the folder examples/spacex_example.
More Info
For more information about the multiple request merge example for each individual SDK, visit the appropriate pages: